- Home
- Craft Photography
- Camera Settings for Product Photography
Camera Settings for Product Photography
Key camera settings for product photography: Here are the basic DSLR camera functions beginner photographers need to master to take great photos of your crafts.
Picking up a DSLR camera for the first time can be pretty intimidating.
The camera is crammed with settings you need to adjust, and if you're a beginner photographer, trying to choose the right settings for the situation can be completely baffling.
Luckily, you don't need to master every feature on your DSLR camera to start taking great product photos.
Essential Camera Settings for Product Photography
To begin, you can focus on learning how to use a few key features on your camera. Here are the essential camera settings for product photography we'll cover to get you ready to start practicing craft photography:
Exposure
- ISO
- shutter speed
- aperture value
- camera modes
Accurate Color
- white balance
I'll explain what each camera function controls, how it impacts your product photography, and how to choose the right settings.
I won't provide detailed explanations about how to adjust each of these camera settings for product photography.
Every camera is a little bit different. What I do to adjust my camera's settings will be different from what you'll need to do to adjust your camera's settings.
To find out how to use each feature on your DSLR camera, check the manual or search online for your specific camera model and the function you need to learn about. You should have no trouble finding articles and videos that have the information you need.
Once you finish this tutorial, if you decide you'd like to learn more about camera settings for product photography as well lighting, prop styling, and basic postproduction, check out Jessica Marquez' Craftsy course, Product Photography at Home. It is created specifically for craft business owners who want to learn to photograph their products, and it's full of information that is easy to understand and apply.
Key Takeaways
Exposure
- Exposure has a big impact on the look of your photos. Three camera settings work together to create the overall exposure: ISO, shutter speed, and aperture.
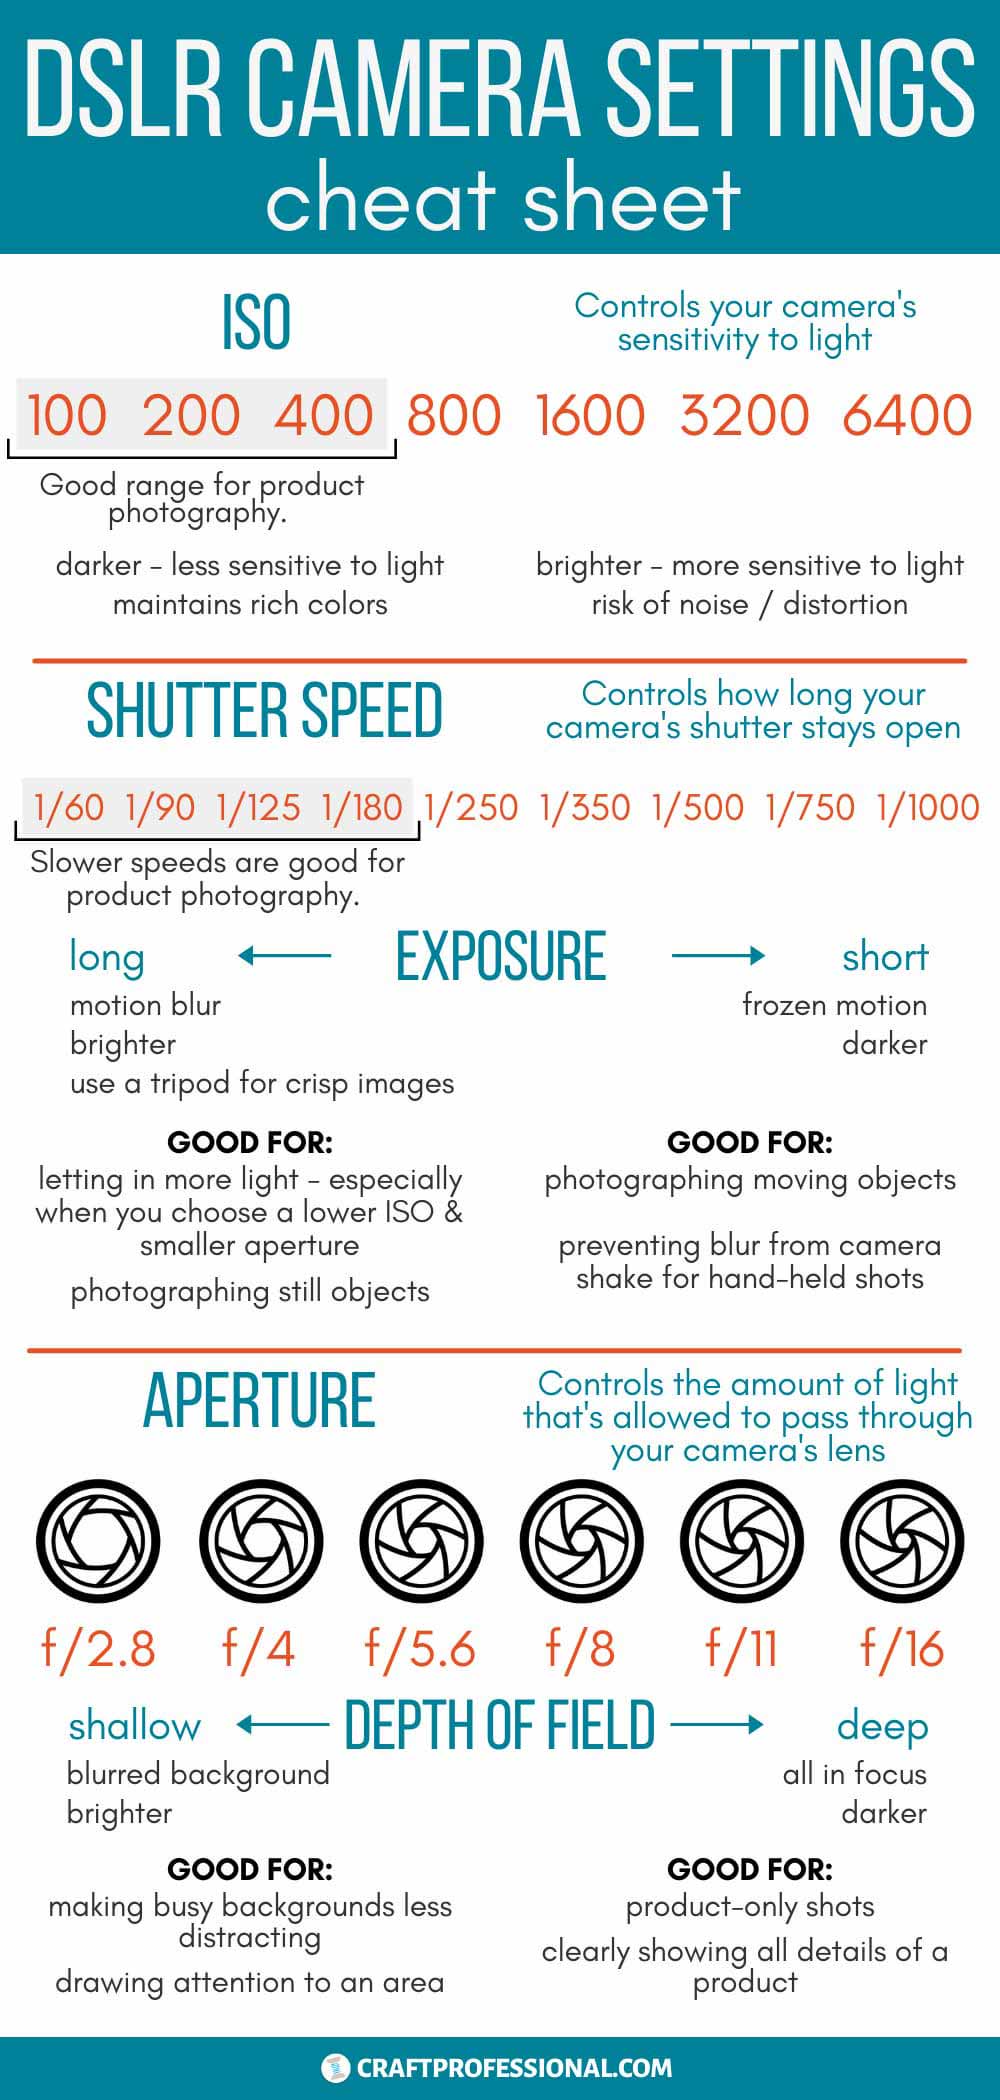
- ISO controls your camera's sensitivity to light. A low ISO setting makes your camera less sensitive to light and preserves rich colors. A high ISO setting makes your camera more sensitive to light but can create unwanted noise (graininess) in your photos.
- Shutter speed controls how long the shutter stays open when you snap a photo. Fast shutter speeds create sharper images and let in less light. Slow shutter speeds let in more light and can create wanted or unwanted blur in your images.
- The aperture setting affects what is in focus and what is blurred in your photos. It's the function that allows you to create great blurred backgrounds that draw attention to your main subject.
- Camera modes are handy settings on your camera that help you achieve the right combination of ISO, shutter speed and aperture settings.
Accurate Color
- Accurate colors are essential in product photography. Setting the white balance on your DSLR camera helps to ensure colors in your images are accurate.
- White balance can be set automatically by your camera, or you can set a custom white balance.
Exposure — ISO, Shutter Speed, and Aperture
The exposure settings you choose impact how sensitive your camera is to light. Some settings will allow you to take great photos with less light. Other settings are more appropriate for times when you have more available light.
The ISO, shutter speed, and aperture settings all work together to form the overall exposure of your photos.
The trick to getting exposure right lies in finding the right balance among these three settings.
ISO
What is ISO?
The ISO sets your camera's sensitivity to light. Changing the ISO changes the amount of light that reaches your camera's sensor. Your photos will appear lighter or darker as a result.
How does ISO affect a photo?
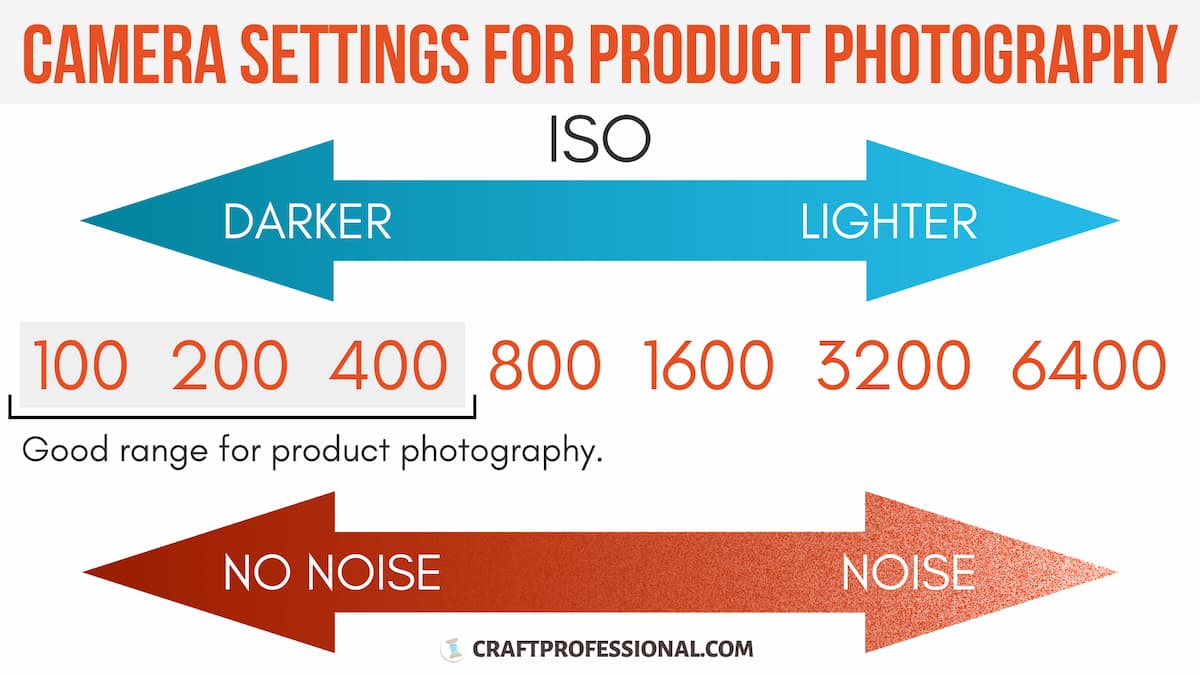
A lower ISO number lets in less light, making your photos appear darker. A higher ISO lets in more light, making your photos brighter.
The ISO setting you choose will also affect the amount of noise (think graininess) in your images.
A low ISO helps to preserve rich colors and eliminate noise. As you move to higher ISO settings, you will start to see distortion or noise in your images.
Some cameras handle high ISO settings better than others. You'll have to experiment with your own camera to determine how well it performs at higher ISO settings.
Of course, no one wants product photos with noise that creates a grainy look.
In her Craftsy product photography course, Jessica Marquez says in product photography, we are usually working with subjects that are not moving, and we can use a tripod. That means we can choose a lower ISO that lets in less light because we can choose a slower shutter speed to compensate. (More on shutter speed in a moment.)
Alternatively, you could adjust the actual lighting in your product photography lighting setup.
What do different ISO settings mean?
Typically you'll find these ISO settings on a DSLR camera:
ISO 100, 200, 400, 800, 1600, 3200, 6400
Some cameras have a greater range, but the range above is quite common.
- ISO 100 makes your camera the least sensitive to light, and lets you maintain rich colors and avoid distortion / noise.
- ISO 6400 makes your camera the most sensitive to light but also creates the most distortion / noise.
What ISO settings should I use for product photography?
The right ISO setting will depend on your lighting conditions.
Ideally, you should aim to keep the ISO as low as possible. My product photography teacher advised beginners that using an ISO of 100 to 400 is a great place to start.
Why are lower ISO camera settings good for product photography?
Have you ever looked at a photo and noticed an all-white area where there's no detail? That's an overexposed image. The all-white area is blown out. You don't want that in product photography. You need to clearly show your product's details.
A lower ISO setting will help prevent images from being overexposed. It will also preserve rich colors and prevent noise.
Choosing a lower ISO setting does mean your camera will be less sensitive to light. If your images are too dark, you can solve that problem in other ways, such as choosing a slower shutter speed.
Shutter Speed
What is shutter speed?
Shutter speed controls how long your camera's shutter stays open. Changing the shutter speed changes how quickly or slowly your camera snaps a photo.
How does shutter speed affect a photo?
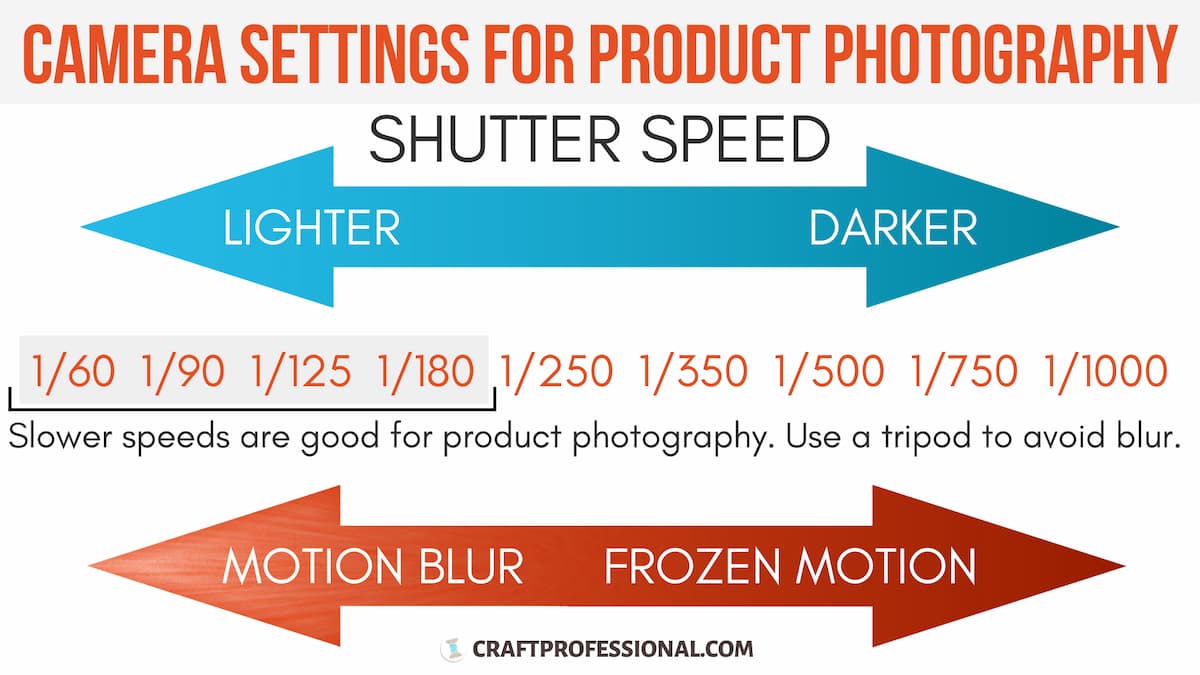
If an object in your scene is moving while you take a photo, the shutter speed will affect how in-focus or blurred that object appears in your image. A slower shutter speed will allow the moving object to blur, creating a softer look and suggesting motion. A fast shutter speed will create a clear image, freezing the movement in time.
Shutter speed can also affect how crisp an image appears when objects in your scene are not moving. At slower shutter speeds, your camera will pick up the tiniest movement of the camera. Those tiny movements will make your images appear blurred — an unwanted effect called camera shake.
Finally, shutter speed impacts the amount of light your camera can access as you snap a photo. Slower shutter speeds let your camera sensor gather more light, resulting in brighter images. Faster shutter speeds let your camera sensor gather less light, resulting in darker images.
Which shutter speed setting lets in more light?
The numbers used to measure shutter speed represent the length of time your camera's shutter stays open.
Shutter speed camera settings for product photography are typically just fractions of a second. You'll often see shutter speeds expressed as a fraction.
To give you an idea, here are some (not all) of my camera's shutter speeds:
1/60, 1/90, 1/125, 1/180, 1/250, 1/350, 1/500, 1/750, 1/1000, 1/1500, 1/2000, 1/3000, 1/4000
When shutter speeds are expressed as a fraction, the top number will always be 1.
When the bottom number is lower — like 1/60 — the shutter speed is slower, which lets in more light.
When the bottom number in the fraction is larger — like 1/1000 — the shutter speed is faster, which lets in less light light.
For example:
If you use a 1/60 shutter speed, your camera's shutter will stay open for one sixtieth of a second. That's fairly slow, so your camera will have time to gather more light.
If you use a 1/1000 shutter speed, your camera's shutter will stay open for one one-thousandths of a second. That's fast, so your camera will gather less light.
Sometimes shutter speeds are described as whole numbers instead of fractions.
Don't worry! It's not complicated.
We know the top number is always 1, so sometimes that number is left off. A shutter speed of 1/60 may be expressed as just 60. A shutter speed of 1/250 may be expressed as 250.
What shutter speed settings should I use for product photography?
Most of the time, you can choose a slower shutter speed for product photography.
The exact shutter speed you'll need will depend on:
- the amount of light you're working with
- the ISO and aperture settings you choose
- the look you want to achieve
As a very general guideline, start by experimenting with speeds between 1/60 and 1/250.
You don't have to limit yourself to this range. It's simply a guideline to give you a reasonable place to start.
Why use slower shutter speeds for product photography?
Keeping the shutter speed fairly slow will allow the camera to gather more light. It will give you the freedom to set other elements — ISO and aperture — to levels that allow less light.
Beware of camera shake!
The biggest downside with using a slow shutter speed is the increased risk of ending up with blurry images due to camera shake.
Even the small movement caused by depressing your camera's shutter button can make images blurry at slow shutter speeds.
Luckily, there are simple solutions.
Use a tripod whenever possible.
A tripod is an essential piece of equipment needed for product photography.
A tripod allows you to use slower shutter speeds because it holds your camera in place. It won't move the way it does when you use a handheld camera..
Jessica Marquez recommends you shouldn't handhold your camera at shutter speeds below 1/60. You'll need a tripod for anything that slow.
A tripod can come in handy at faster shutter speeds a well. It will help:
- keep images crisp
- keep your setup, including camera distances and angles consistent
- and free up your hands for other tasks
Consider using a remote shutter release.
A remote shutter release allows you to activate your camera's shutter without touching the camera, keeping images crisp at low shutter speeds.
It's not quite as essential as a tripod. However, it can help, particularly at slow shutter speeds. And as photography gear goes, remote shutter releases are not terribly expensive.
Aperture
What is aperture?
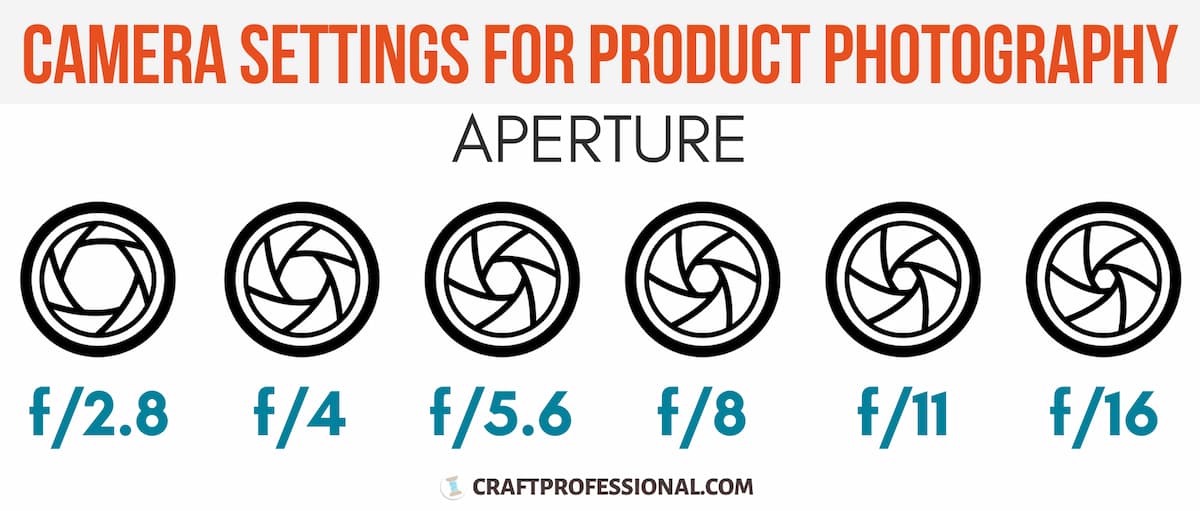
Aperture controls the amount of light that's allowed to pass through your camera's lens. It is expressed in f/stops (or f/numbers) like this:
f/2.8, f/4, f/5.6, f/8, f/11, f/16
Changing the aperture setting on your camera causes a set of metal blades in the lens — called a diaphragm — to open or close. This change affects the amount of light your lens will let in.
How does aperture affect a photo?
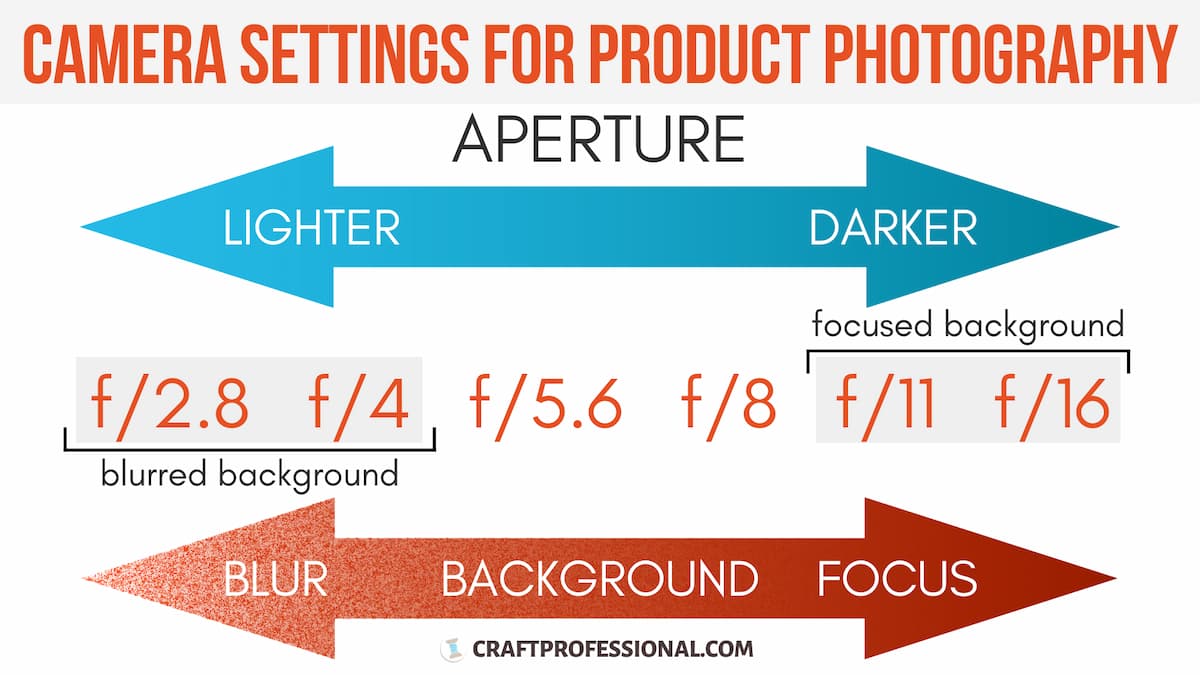
When you adjust the aperture setting on your camera, your images will appear lighter or darker.
The aperture setting can be used to create an appealing effect in which objects in the background of your image appear out of focus. If you hear someone talk about "depth of field," that's what they are referring to. You can create that effect with a wide aperture.
Wide Aperture
Light: When you choose a smaller f/number — like f/2.8 — you have a wide aperture. The diaphragm in your lens opens up and lets in more light, so your images will appear brighter.
Background Blur: You need a wide aperture to create an out of focus background. A lower f/stop number produces a larger out of focus area in your photo.
Photographers call this effect a "shallow depth of field."
Narrow Aperture
Light: When you choose a larger f/number — like f/16 — you have a narrow aperture. The diaphragm in your lens closes and lets in less light, so your images will appear darker.
Background Blur: If you want everything in your image to be in focus, you need to choose a higher f/stop.
What aperture settings should I use for product photography?
It depends on what you're trying to achieve.
Choose a wide aperture, that is, a lower f/number — like f/2.8 or f/4 — when you:
- want to make the background of your image appear out of focus
- want to let in a lot of light
If you're taking lifestyle product photos, you may want part of the background to be out of focus. In this case, you'd need to use a wide aperture.
A shallow depth of field with your product in focus and the background out of focus can create a dreamy atmosphere, and effectively draw attention to a specific area of your photograph.
It's also a good way to make a busy background less distracting.
Wide Aperture - Shallow Depth of Field Example
This lifestyle product photo from Jessica Marquez's handmade line, Miniature Rhino, uses a wide aperture (lower f/number). It keeps the model and product in focus while blurring the busy background, so it isn't distracting.
Choose a narrow aperture, that is, a higher f/number — like f/11 or f/16 — when you:
- want to keep everything in your image in focus
- want to let in less light
If you're taking product only photos on a white background, a narrow aperture is a better choice. In this case, you'll want your photos to show all of the details of your product, so the entire image should be in focus.
Camera Modes
Way back at the beginning of this tutorial, I mentioned that ISO, shutter speed, and aperture all work together to create the exposure of your images.
We've looked at each function individually, but you might be wondering how to choose the right combination of settings for these elements.
That's where camera modes are your best friend!
What are camera modes?
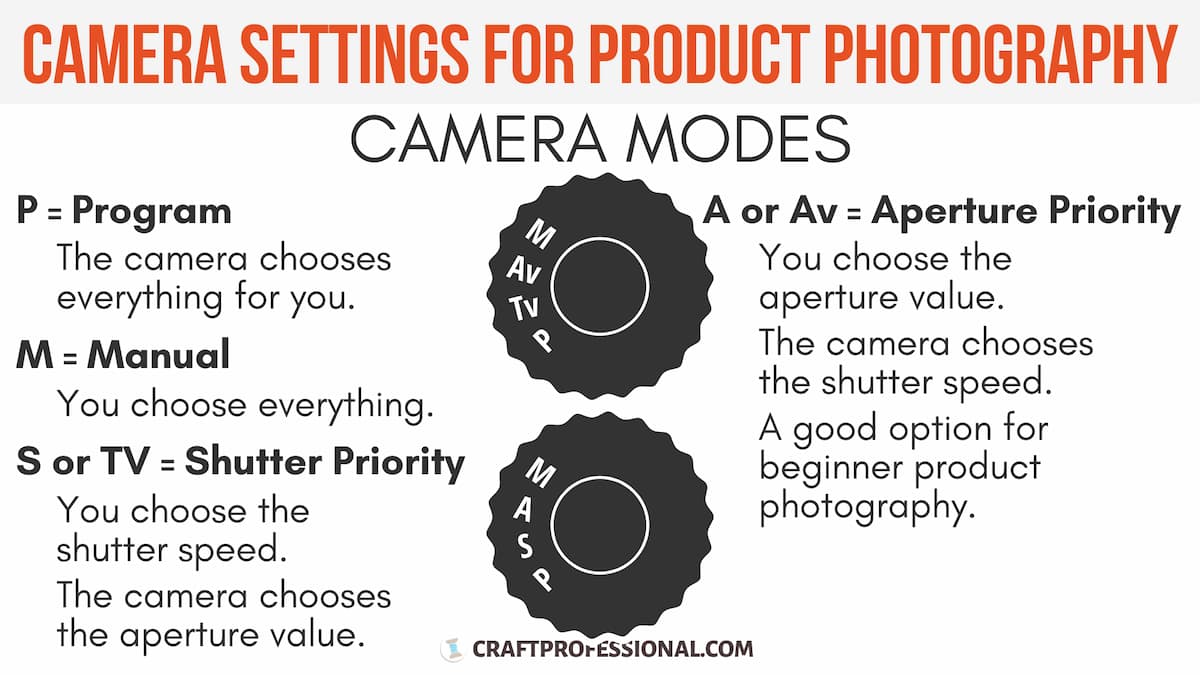
A camera mode is a combination of settings that helps you adjust the elements that control exposure — ISO, shutter speed, and aperture.
Different modes give you control of certain elements while giving the camera control of other elements.
For example, if you set your camera mode to aperture priority, you will control the aperture setting. Your camera will automatically choose the best shutter speed to go with the aperture setting you select.
How do I change the mode on my camera?
Take a look at the top of your camera.
If you have a Canon DSLR camera , find a wheel with the letters P Tv Av M.
If you have a Nikon DSLR camera , look for a wheel with P S A M.
There will be other letters or icons on the wheel. We won't worry about them for now.
That wheel is what you use to choose a camera mode.
What are the different modes on a camera?
Here's what those letters on your camera's control wheel mean.
Program (P)
Of the four modes, this setting gives you the least control. Your camera will automatically choose the aperture value and shutter speed based on the existing light balance.
Shutter Priority (Tv or S)
This setting allows you to select the shutter speed. Your camera will automatically choose an aperture value that will work well with the shutter speed you select.
Aperture Priority (Av or A)
This setting allows you to select the aperture value. Your camera will automatically choose a shutter speed that will work well with the aperture value you select.
Manual (M)
This setting gives you the most control. You manually choose the aperture value and shutter speed.
What camera mode should I use?
That depends on what you're trying to achieve in your photos. However, aperture priority will often be a good option to help a beginner choose the right camera settings for product photography.
Program (P)
I don't recommend using program mode.
You might think putting your camera on full automatic with program mode would be a good option for beginners. After all, if you're not sure what are the best camera settings for product photography, why not let the camera decide?
The problem with program mode is different settings will create different effects in your photos. And your camera doesn't know what effect you're going for.
You need some control to create the look you want.
Also, if you always use program mode, you'll never get any practice experimenting with different camera settings for product photography to learn how to create the look you want.
Shutter Priority (Tv on a Canon or S on a Nikon)
Shutter priority will be a good option if you're dealing with movement in your photos. If objects you want to photograph are moving, shutter priority will give you control over how that movement appears in your images.
On shutter priority, the camera will automatically control the aperture value.
Most of the time, in craft photography, you won't be dealing with moving objects. But if you are, try switching over to shutter priority and see if you like the result.
Aperture Priority (Av on a Canon or A on a Nikon)
Aperture priority is a great starting place when you're learning craft photography.
Aperture priority gives you control over the depth of field. It lets you choose to create photos with attractive out of focus backgrounds or images that are fully focused showing your products in crisp detail.
On aperture priority, the camera will control the shutter speed for you. If you're not dealing with a moving object, you can get away with letting the camera control shutter speed, giving you one less decision to make.
Fewer decisions can be most welcome when you're trying to master DIY product photography.
Manual (M)
A lot of people will tell you manual mode is the best choice. I'm not convinced it's the best choice for a beginner.
Learning to master manual mode is an excellent goal. It gives you full control of your camera's settings, which gives you full control of the look you can create.
Manual mode might not be the best place to start, though, if you're a beginner photographer.
Having full control of your camera is great when you know how to choose the right combination of camera settings for product photography to get the look you want.
If you're still trying to work out how different combinations of settings work together to create different effects, having full control of your camera can be a recipe for disappointment and frustration.
If your subject is not moving, and you start on aperture priority mode you can freely experiment with different aperture values, letting the camera make decisions about shutter speed.
As you experiment, notice the shutter speeds your camera selects under different conditions and how the resulting images look.
Get a feel for how different combinations of aperture value and shutter speed work together. Then, if you want more control, you can move to manual mode with a foundation of experience that will help you choose the right combinations of camera settings for your product photography.
Accurate Color
Product photos need to show colors accurately to provide a clear impression of your items.
Unfortunately, plenty of factors, from the lighting you choose, to the objects in your environment, to the clothing you wear, can make color in your photos inaccurate.
While you can correct colors when you edit product photos, you'll save yourself a lot of time and headaches in postproduction if you can get your colors as accurate as possible from the start.
Luckily, your DSLR camera has a feature to deal with this problem.
White Balance
What is white balance in DSLR photography?
White balance is the feature on your camera that helps make white objects in your scene look white in your photograph. If you get your whites looking white, the other colors will be accurate as well.
There are a couple of things you can do to keep your colors accurate before you even touch your camera.
- Use only one type of light source. Using more than one of light confuses your camera when it comes to setting white balance.
- When possible, avoid strong colors in your environment that could cast color onto your scene. You can avoid this problem entirely with light box product photography.
How do I get white balance right on my camera?
On a DSLR camera, you'll find a number of options for setting the white balance.
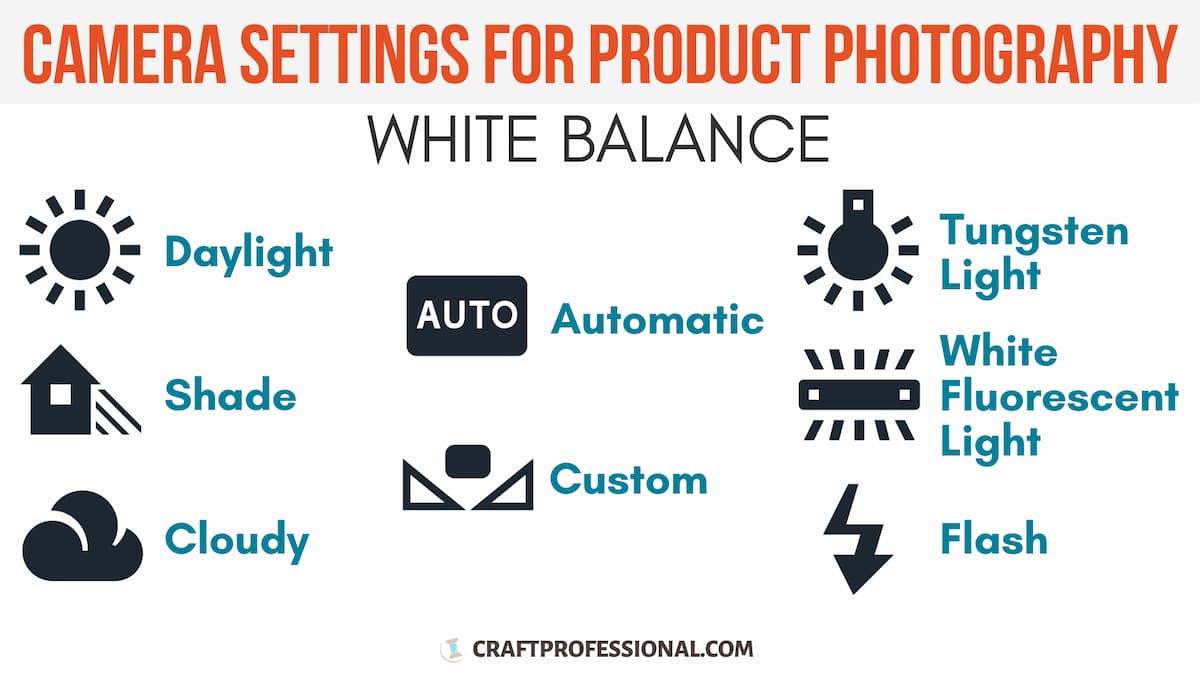
My camera's white balance choices include:
- auto
- daylight
- shade
- cloudy
- tungsten light
- white fluorescent light
- flash
- custom
You'll find similar choices on your own DSLR camera. The location of the controls to set your camera's white balance may not be obvious. Check your camera's manual if you can't find them.
Auto White Balance
Auto white balance is exactly what is sounds like. Your camera will take a reading of the lighting conditions in your scene and automatically set the white balance.
This setting is helpful but limited. Other options will help you get the most color accuracy.
White Balance Presets
White balance settings like daylight, shade, cloudy, tungsten light, white fluorescent light, and flash give your camera extra information to get colors accurate.
Different types of lighting conditions have different color temperatures. A photo taken by candlelight will have a warm cast, while a photo taken outside on a cloudy day will have a cooler cast.
These settings help your camera account for the type of light you're using. Simply choose the white balance setting that matches the type of lighting you're using, and your camera will adjust accordingly.
Custom White Balance
The custom white balance setting will give you the most accuracy when it comes to color.
Once you have your lighting, backdrop and scene set up, you need to photograph a white card in that space. The white card acts as a reference point telling your camera, "this object is white." With that information, your camera can make more precise adjustments to show colors accurately.
After you photograph the white card, you'll need to follow some prompts on your camera to tell it you want to use that image to set the custom white balance.
Setting up custom white balance is the most complex of all the white balance options on your camera. It requires a few steps, and they might not be intuitive. Check your camera's manual and follow the instructions carefully.
You don't need to learn how to use every complex, obscure feature on your camera, particularly if you're just getting started. However, custom white balance is an extremely helpful and useful tool. It's well-worth learning how to use this feature on your camera.
Camera Settings for Product Photography Review
Phew!
That may seem like a lot. Keep in mind, there are only four settings to think about: ISO, shutter speed, aperture, and white balance.
Let's review the basic camera settings for product photography:
ISO
Controls your camera's sensitivity to light.
In general, for product photography, try to keep the ISO around 100 to 400 to preserve rich colors and avoid unwanted noise. Some cameras can handle higher ISO settings, so experiment with yours to see how it responds.
Shutter Speed
Controls how long your camera's shutter stays open.
This setting is a priority when you're photographing moving objects. A slow shutter speed — like 1/60 — will let in more light, and moving objects will appear blurred. A fast shutter speed — like 1/1000 — will let in less light, and moving objects will be in focus.
Aperture Value
Controls the size of your lens' diaphragm. It affects how much light passes through the lens and whether backgrounds are out of focus or in focus.
A low f/number like — f/2.8 or f/4 — will let in more light and create an out of focus background. A high f/number — like f/11 or f/16 — will let in less light and the entire image will be in focus.
Camera Modes
Camera modes help you choose the right combination of ISO, shutter speed, and aperture value.
- Program (P) — Your control is limited. The camera automatically chooses the shutter speed and aperture value. Program mode doesn't give you enough control to create the specific look you want.
- Shutter Priority (S or Tv) — You choose the shutter speed, the camera chooses the aperture value. A good choice for beginners photographing a moving subject.
- Aperture Priority (A or Av) — You choose the aperture value, the camera chooses the shutter speed. Often a good choice for beginner product photographers.
- Manual (M) — You have full control to select everything. Aspire to learn to use manual mode. It will give you the most control once you have the skill to select good combinations of camera settings for product photography.
White Balance
Helps ensure the colors in your photos are accurate. You can easily use the camera's auto white balance or a preset based on your light source. With a little more work, you can use the custom white balance feature for more accuracy.


New! Comments
Have your say about what you just read! Leave me a comment in the box below.