- Home
- Craft Photography
- Product Photography Lighting Setup
3 Product Photography Lighting Setup Techniques
A product photography lighting setup consists of three key components:
- a light source, which can be artificial or natural lighting
- a reflector to reflect light from the source back into the scene, adding light and balancing shadows
- and sometimes a diffuser is used to create more even light and softer shadows
There are countless different ways you can set up your lighting for product photography. The setup that achieves the best results for your products will depend on the type of item you're photographing and the overall look you want to achieve.
Proper lighting is one of the most important factors in achieving amazing photos needed to entice a potential customer to buy.
Luckily, you can take high-quality images for most products using an affordable home photo studio and a simple product photography setup.
The fundamental configurations you'll use to light your product photos all come down to some arrangement of the three elements:
- light source
- reflector
- and (possibly) light diffusers
3 Product Photography Lighting Setup Techniques
To keep things simple, we'll examine three basic product photography lighting setups:
- Side Lighting
- Back Lighting
- Front Lighting
You don't have to spend a lot of money to achieve the right lighting.
These arrangements can be achieved with a basic home photography studio. They will give you a solid starting point. You can experiment from there.
1. Side Lighting
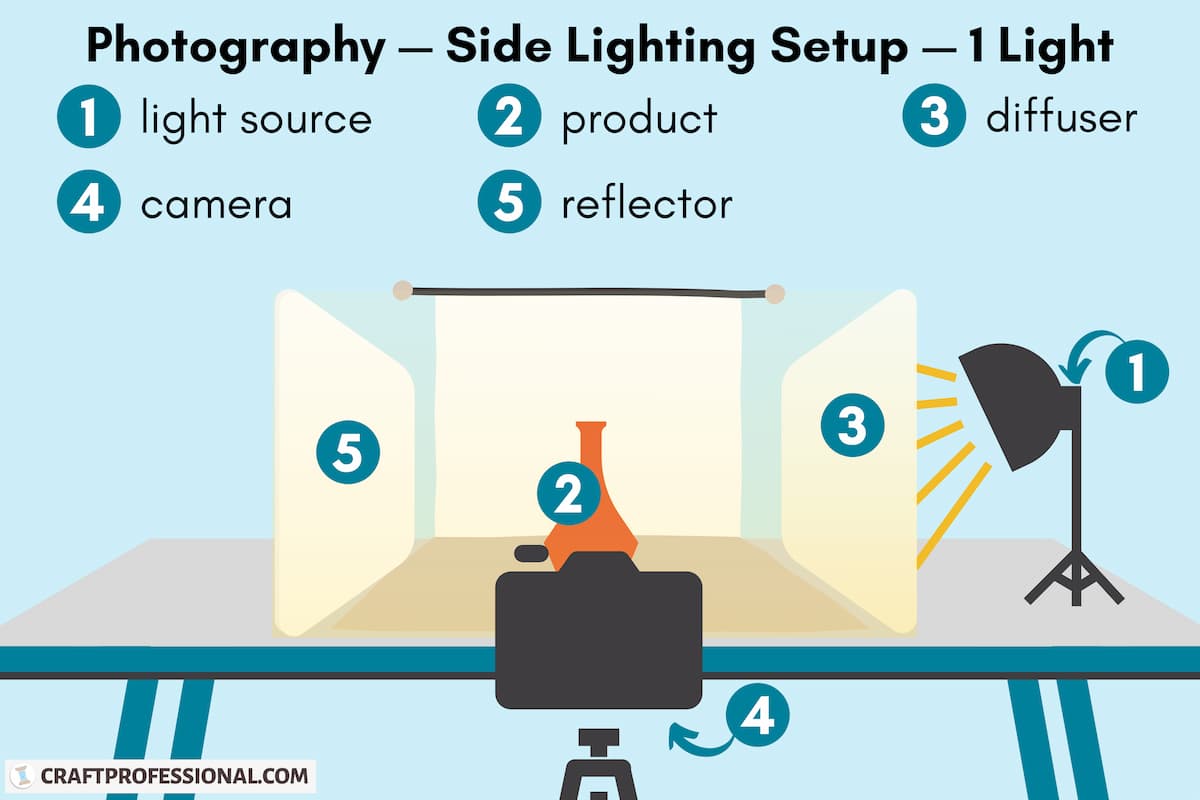
When you place your light source to one side of the item you're photographing, you have side lighting. Your product will be lit on one side with shadows falling on the opposite side.
From this starting point, you can refine and experiment with your side lighting setup.
Add a Diffuser
Defined shadows created by hard light from bare light bulbs or direct sunlight are typically not found in good product photos.
Diffusers are an affordable, great way to create a softer quality of light whether your source is natural lighting or studio lights.
If you want to soften the shadows that fall on the unlit side of the product, just add a diffuser between the light source and the product.
You'll create soft light that is more evenly spread out as it passes through the diffuser, and heavy, harsh shadows in your scene will become softer.
Don't worry if you're working with a tight budget. You probably already have something around the house that will work as a diffuser.
Any plain, translucent, white cloth — a curtain, sheet, or t-shirt stretched over some type of frame — can function as a diffuser. If you want to get fancy, you can even make your own softbox (a light combined with a diffuser) with items you probably have around the house.
Add a Reflector
If you don't have enough light in part of your scene, a reflector can help.
To add more light to the side of the scene that's facing way from the light source, place a reflector on that side of the scene facing the light source.
Light from your source will hit the reflector, bounce off of it, and fall back into the scene you're photographing. Bouncing this back into your scene with a reflector will increase the amount of light available to your camera and minimize shadows so they appear softer and less distracting.
Add a Second Light Source
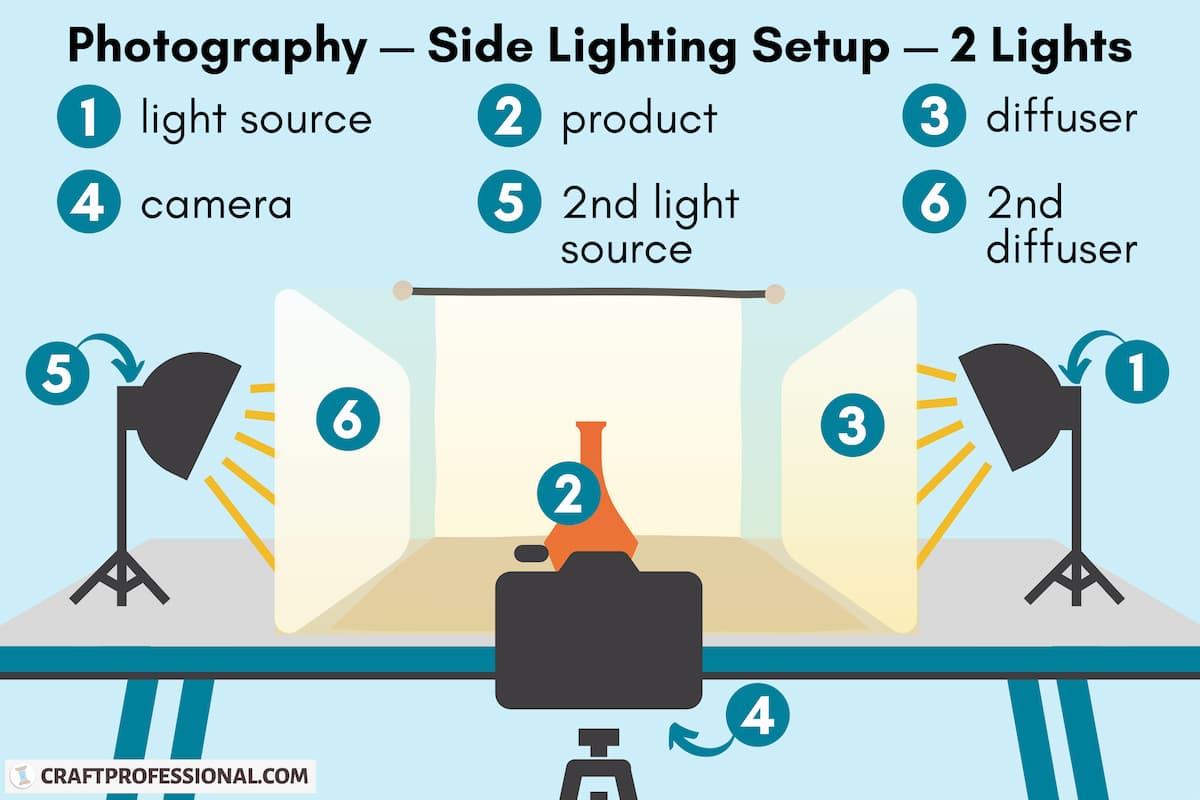
If you're using artificial light, try adding a second light. Place it on the opposite side of your product, facing in the direction of the first source.
A second light placed on the opposite side of your product will create balance so both sides of the product will be lit evenly and shadows will be eliminated. This lighting setup can work well in white backdrop light box product photography.
Move the Light(s)
Start with your light at a 90 degree angle from the camera, directly facing the side of your product, then experiment with the direction of the light.
Move the source so it is positioned anywhere from about 90 to 130 degrees from the camera. Notice how the shadows change as you move the light through different angles.
Move the Reflector
Moving the reflector will change the angle at which light is bounced back onto your subject, which will change the look of your photo.
Start with your reflector directly facing your light source, and then experiment with the reflector's position and angle to find a look you like.
Adjust the Height of Your Light(s)
The height at which you position your light will affect the shadows.
When your source is at a low angle, shadows will be longer. When it is placed higher and aimed down toward your product, you'll get shorter shadows like you'd see in nature.
Photography light stands are extremely helpful here. They'll allow you to easily adjust the height and angle of your studio lighting.
2. Back Lighting
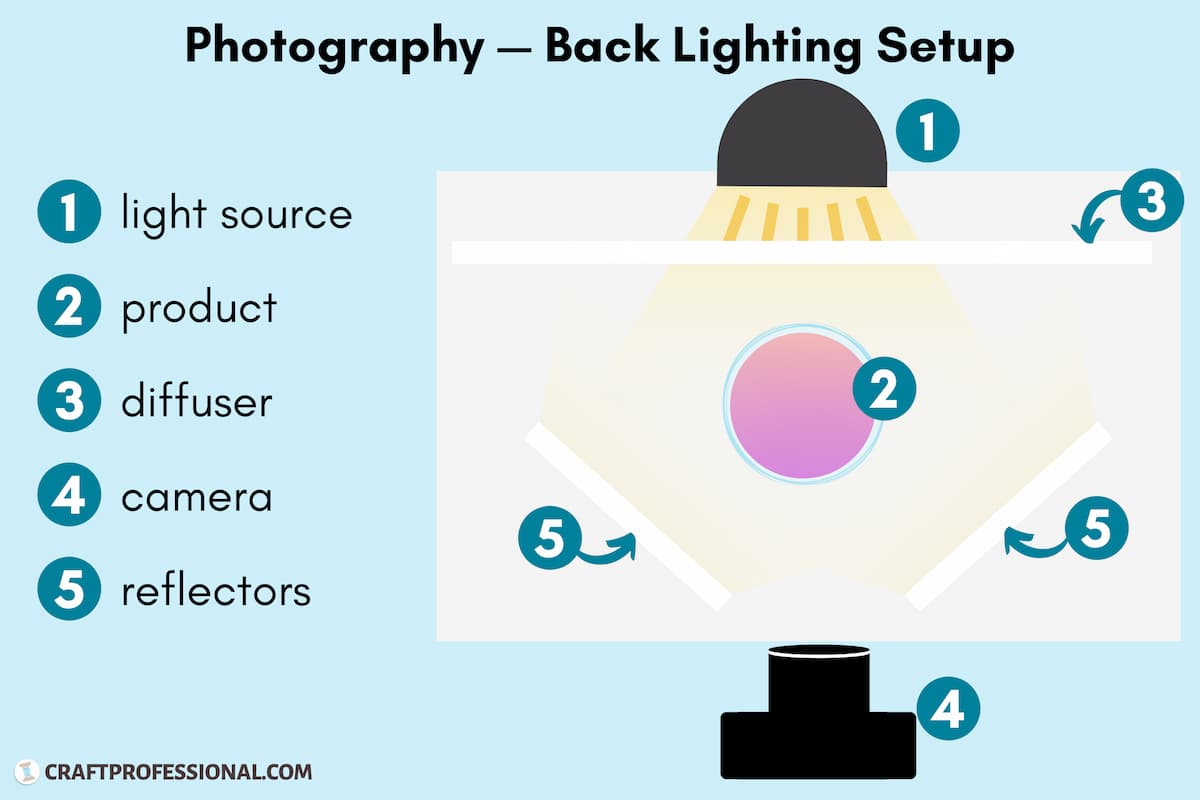
When your light source is at the back of the product, you have back lighting.
This setup creates great product photography lighting for translucent items like glass. In a basic back lighting setup, you can create dramatic effects by placing your light source behind the product, and setting up a diffuser between the light source and the product.
Add a Reflector
Try adding a white foam board reflector in front of the product to bounce some light onto one side of the front of your subject.
Alternatively, you can add two reflectors, one on each side of the scene, placed just out of the camera's view. Two reflectors will bounce light back onto both sides of your product to create a more balanced and symmetrical look.
Keep in mind, if you're photographing something reflective, like glass, you'll need to be careful with the placement of your foam boards. They can create unwanted reflections, in which you can see the foam board reflected on your product in the photo.
It's a good idea to take a test photo and examine it carefully to ensure you haven't created any unwanted reflections before you proceed.
3. Front Lighting
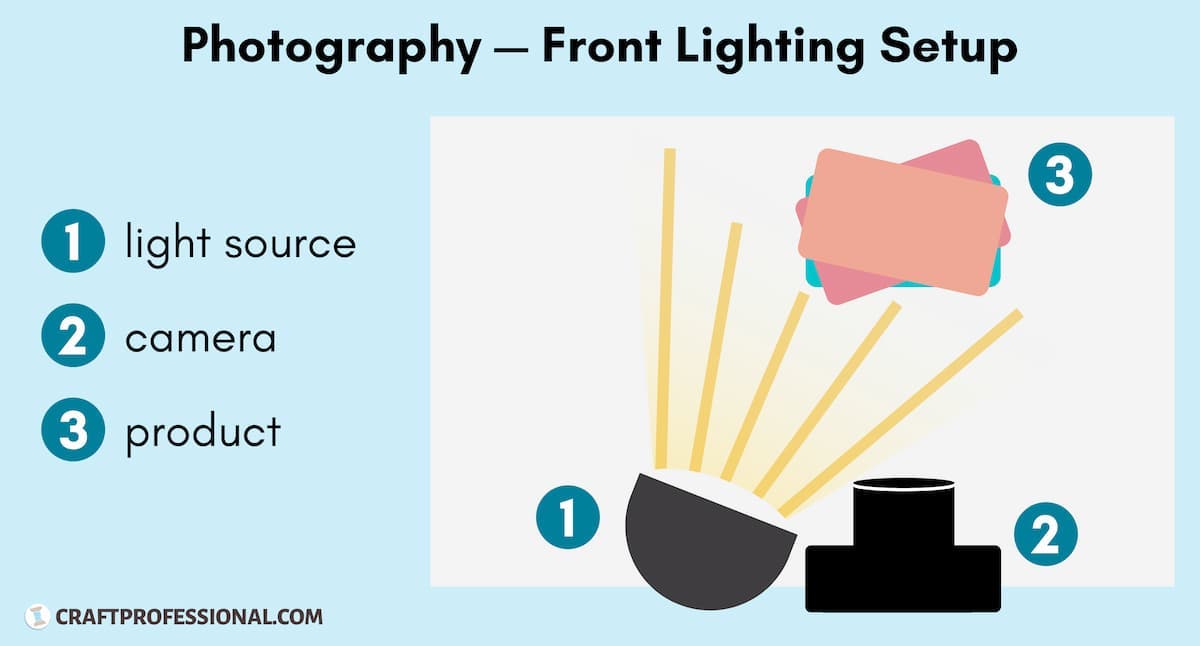
When your light source is positioned directly beside the camera, you have front lighting.
Typically, sidelight or backlight will be a better option for craft photography. With front lighting, the shadows fall behind the product, which can make your product images look flat.
Different types of surfaces react differently to light, so you may want to give a front lighting setup a try and see how your products look. If you're not thrilled with the results, try switching to side lighting, which is more universally effective product photography lighting.


New! Comments
Have your say about what you just read! Leave me a comment in the box below.