Office and Craft Room Organization Plan
A home office and craft room organization action plan to help you finish the year with a tidy, functional work space.
Home office and craft room organization is a great task to take on in December. Once preparations for holiday sales are complete, many craft businesses enter a period that tends to be quieter. You may find you have a little time to get your craft supply storage and office files under control.
Going into the new year with a fresh start and a clean, well-organized craft room and home office is a wonderful gift you can give to yourself and your business.
I've been meaning to get my own office and craft space under control for almost a year. You'll see in the photo below just how bad it got.
I spend a lot of time in this space, so I want it to be functional and comfortable.
Before the big organization project, it was neither of those things. In fact, there were some projects I have avoided working on for months simply because my work space wasn't functional.
My office / craft room is small, and I wanted to use it for several purposes. That meant I needed to plan this organization well.
The 14 step home office and craft room organization plan below is the strategy I used to turn a small, out of control office and craft room into a functional, efficient happy place without making time-wasting or budget-busting mistakes.
Your Office and Craft Room Organization Plan
Here are the steps you'll take to get your home office and craft room organization mission accomplished:
- Assess the situation - Take a big picture look at what you have to work with and how you want to use the space.
- Purge your stash and see what you have - Get rid of anything you don't need or want. Group the rest into categories.
- Find the perfect office & craft room storage solutions - Once you know what you have and how you want to use the room, you can choose office and craft storage solutions that perfectly meet your needs.
- Get it done! - Get to work, and put the room you tore apart back together - this time in a functional, orderly fashion.
- Live with it and make adjustments - See what works and what doesn't. Make changes as necessary.
1. Assess the situation
Or, if you're me, admit you have a problem.
Looking at the photo below of my own work space, it's abundantly clear why I didn't work efficiently and avoided doing certain tasks in the space. It's strange how you can walk into a room every day and not fully see all of the issues.
It's time to take stock!
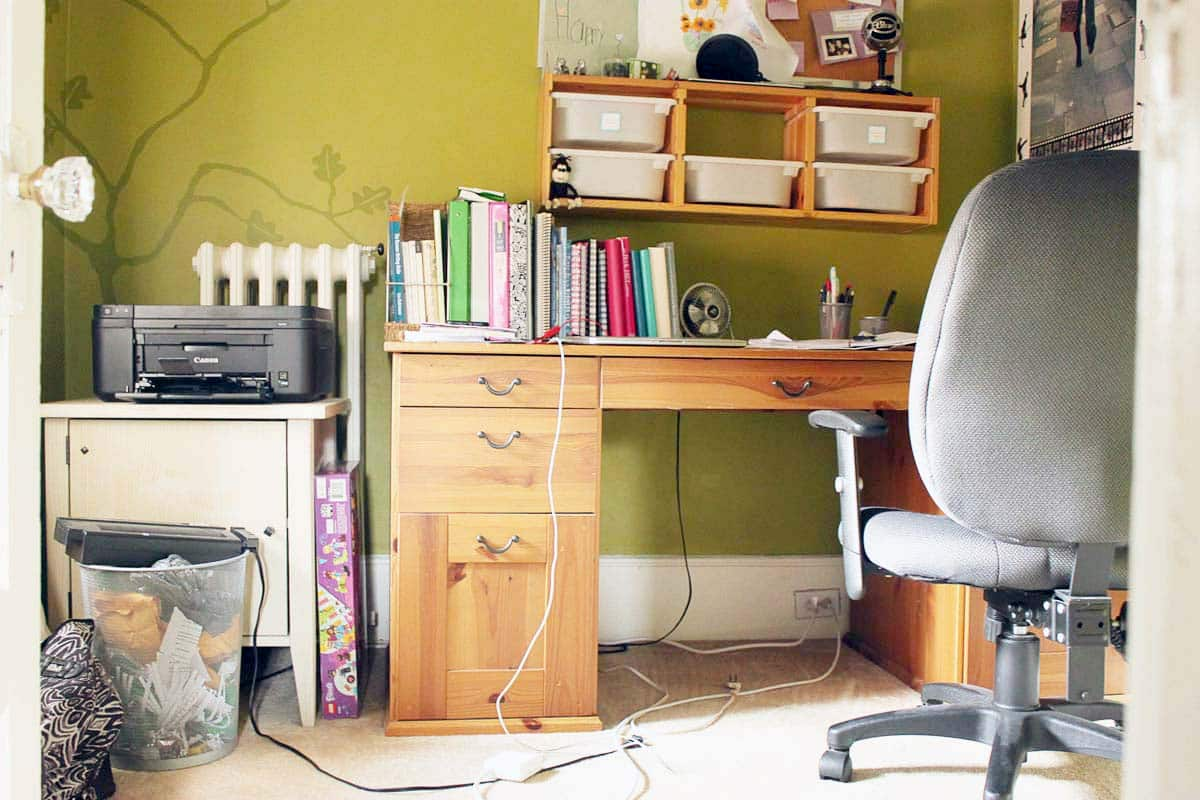 My home office and craft room organization disaster.
In your initial assessment, take a very big picture look at:
- what you have to work with
- what you want to accomplish
- how you want to use the space
Don't Get Into the Details Yet.
Step one is not the time to decide where you'll store your favorite gel pens. At this point, you don't have enough information to make the best decisions at that level of detail.
As you work through your office and craft room organization project, your understanding about what your space needs may change.
Get Down to Business:
1. Assess your space. I hope it's not as bad as mine!
Simply take a look around and assess your space. Be honest. I hadn't fully grasped how out of control my space was until I stopped and really looked at it.
Consider taking a photo of your work space to assess your situation. It's surprising how many things you'll see in a photo that normally go unnoticed. A before photo will also help you appreciate all of your progress when you're finished your big organization project.
You can use this tip when designing a craft show display booth as well. Photograph your display, and you'll see more clearly what's working and what isn't working.
2. Determine how you want to use the room. Consider how you currently use your work space and how you'd like to use it in the future. Ask yourself what's working and what isn't working right now. You may be limited by space or budget, so be realistic and strategic.
3. Make a rough design plan. Work out a very rough, big picture plan for how you'll use the space. Consider potential work and storage zones. Think about ideal areas for doing certain tasks and the best placement of furniture, particularly larger items.
Here's the list I made - after I got over the shock of the mess - based on my impressions of my own work space.
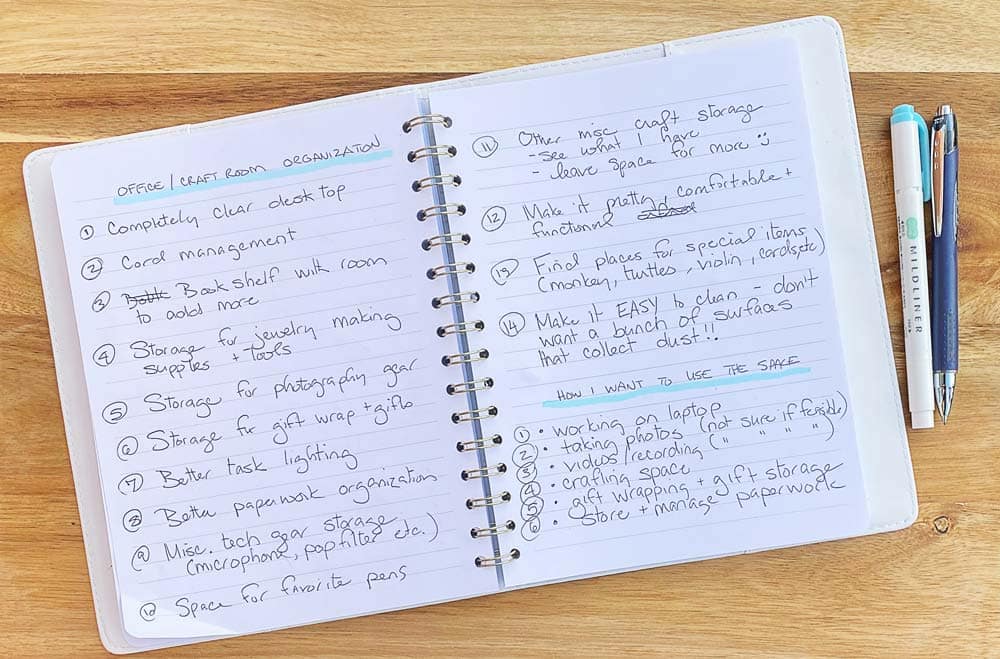
In case you can't read my messy handwriting, here's what I included on my office and craft room organization wish list:
- completely clear desktop
- cord management
- bookshelf with room to add more
- storage for jewelry making supplies & tools
- storage for photography gear
- better task lighting
- better paperwork organization
- miscellaneous tech gear storage
- space for my favorite pens
- other craft storage - see what I have - leave space for more
- make it pretty, comfortable and functional
- find places for special items
- make it easy to clean - don't want a bunch of surfaces that collect dust!
And here's how I want to use the space now and in the future:
- working on laptop
- taking photos (if possible)
- video recording (if possible)
- crafting space
- gift wrapping and storage
- store and manage paperwork
That's a lot to demand from a small room that only measures 8.5 feet by 7.5 feet. It's not even as big as a craft booth space!
2. Purge your stash and see what you have
Once you decide you want to organize a room in your home, it's tempting to dive straight in and buy a pile of storage supplies and containers.
Big mistake!
You can't choose the perfect storage solutions for your specific needs until you know what you need to store, where you want to store it, and how much space you have available.
Before you buy anything - before you even start looking at craft and office storage ideas - you need to go through your stash.
I'm serious. If you haven't already purged your stash, step away from Pinterest!
Tossing items you haven't used in years and will never use in the future can have a huge impact on improving your work space. You might discover you don't actually need as much storage as you thought. You may just need to get rid of the clutter.
Get Down to Business:
4. Purge your stash. It's time to go through your work space and get rid of the stuff you'll never use and items you should have tossed years ago.
Sometimes things just become a fixture in our spaces. We stop seeing them or thinking about them, so they sit there collecting dust and taking up space.
Take my printer, for example. It hasn't worked in years, but it continues to sit, useless, in my tiny office taking up a lot of space.
Go through your closet, desk drawers, containers, paperwork files - anywhere you store stuff - and get rid of things you don't need. Do be sure to contact your accountant if you're thinking of getting rid of old documents you've stored for tax purposes to clarify what you can shred and what you need to keep.
If you have a particularly large or unruly stash, this job may take a while. If you can't imagine doing the entire task in one go, break it up into more manageable sections.
5. See what you have. As you purge, as much as possible, group the items you're keeping into categories based on what should be stored together. Grouping like items together will help you see what you have and what kind of storage you need.
Make a list of the different types and groups of items you need to store and approximately how much storage space you'll need. Also list anything you may want to add to your stash in the future. For example, if you plan to learn product photography in the near future, allocate some space for photography gear now.
If you need to continue working in your space through your office and craft room organization project, you may need to put things back after you purge but before you've found and bought your craft storage solutions. If you can't live with piles of stuff until the job is done, take photos of your piles before you put it away. Photos will help you remember what you need to store and see about how much storage space you'll need.
3. Find the perfect office & craft room storage solutions
Now that you know what you have, what you plan to get in the future, and how you want to use your space, it's finally time to get down to details.
Get Down to Business:
Look for clever office organization systems and craft storage solutions to fill the gaps in what you already have. You might simply need a few well-placed containers, or you might require some storage furniture to make your space work.
6. Determine where you'll store each type of item. In step five, you listed the groups of items you need to store, and in step three you created an overview of how you want to use the space. Refer back to both of those lists, and work out where you want to store items and where you want to create work spaces.
7. Find storage solutions. Before you buy any storage containers or furniture, check the dimensions carefully. Note the amount of space you have available as well as the amount of space you'll need to store your items to make sure the containers you buy will fit and function well in your space.
You've put a lot of care into planing your office and craft room organization. Don't waste it by buying baskets that are beautiful but too big to fit on your shelf or too small to hold the supplies they were meant for.
Make a list of what you need, where it will go, how you will use it, the dimensions required, and start searching your favorite shops for clever office organization systems and craft storage solutions to fill the gaps in what you already have.
8. Save room for future items. Avoid jam-packing every available space. We all know items in the craft stash somehow multiply when we're not looking. Making extra space now will help you keep your office and craft room organized well into the future.
9. Buy what you need. Finally, it's time to buy what you need to make your work space functional.
If you have a long and pricey wish list, keep in mind, you don't have to buy everything all at once. You can start with key pieces that are essential to make the room functional and keep a wish list for things you'd like to add to your work space in the future.
Here's what I bought to get my office and craft room organized:
This purchase was a must-have item. I've avoided working on certain tasks in my office because the lighting is terrible. After a lot of research, I chose an LED lamp with several settings.
Another must-have purchase. Books were taking over the top of my desk, giving me limited space to work. I went with acrylic because they will blend in, and I wanted a cleaner look for my workspace.
I love this company's colorful office organization gear. In keeping with my goal to maintain a mostly clear desktop I want to store supplies in well-organized desk drawers.
Two of these organizers fit perfectly in my middle desk drawer.
I bought more organizers for my desk's side drawers. I couldn't find colorful ones that would fit well. So this time I went with plain grey containers.
I wasn't going to replace my existing hanging files. Then I saw these beautiful aqua folders. That's when I decided I needed some new hanging folders as a reward for purging years of old, useless paperwork.
Battery Operated Lights for the Closet
This purchase was a bit frivolous. Office closet lighting is not central to the good functioning of my work space. But have I mentioned how much the bad lighting in my office / craft room annoys me?
There are a few more items I want to buy for my space. But first I want to live with what I have and see how it all works.
4. Get it done!
You're done dreaming and planning. Now it's time to get down to work and put together your updated, efficient work space.
Get Down to Business:
10. Put your new organization systems in place. Be patient, and take the time to set everything up exactly as you want it.
11. Make labels. When it comes to keeping things organized, labels are a huge help. They remind you where things belong and encourage you to put everything back in its proper place.
Labels are doubly helpful if other people use your work space. My family knows I mean business and expect a space to remain orderly if I break out the label maker.
12. Make it attractive. You didn't put in all of this effort to end up with a boring office or an uninspiring craft room. Now that you have all of the functional items in place, add some decorative elements to liven up your space.
5. Live with it and make adjustments
You have a fabulous, updated home office / craft room. It's time to start enjoying and working in your new space to see how well it functions.
Get Down to Business:
13. Find out what works and what doesn't. Live with your newly designed space for a while and look for anything that needs some improvement. You put a lot of care into planning the space, so you shouldn't have to make huge changes. But, as you work in your new space, you may need to make some small adjustments to your setup.
14. Make a wish list. You may have a few items left to purchase. Perhaps you wanted to work in the space for a while before committing to an item. Or maybe you fell in love with something that isn't in your budget at the moment.
If there are any items you might like to add to your space, keep track of them somewhere (Pinterest, perhaps) for future reference.
Most of all, enjoy working and creating in your newly designed space.
My Updated Home Office and Craft Room
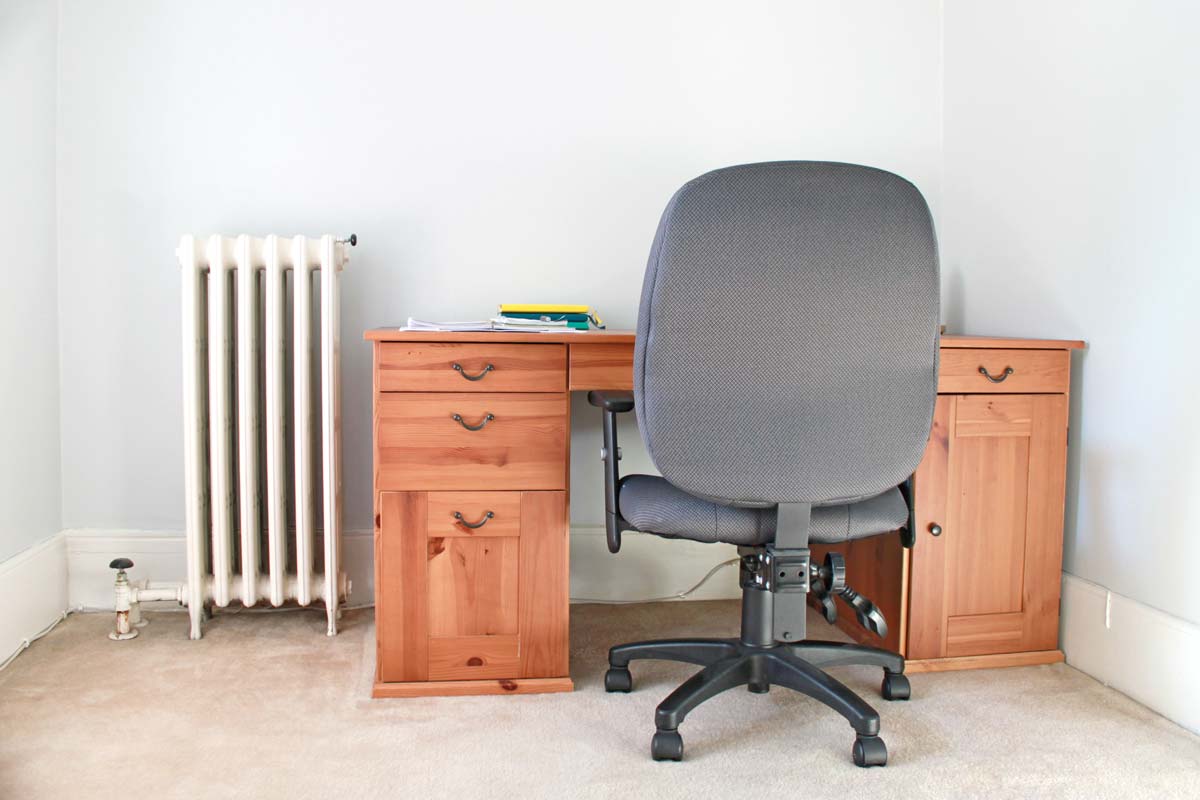 My tidy home office. I can't believe it's the same room.
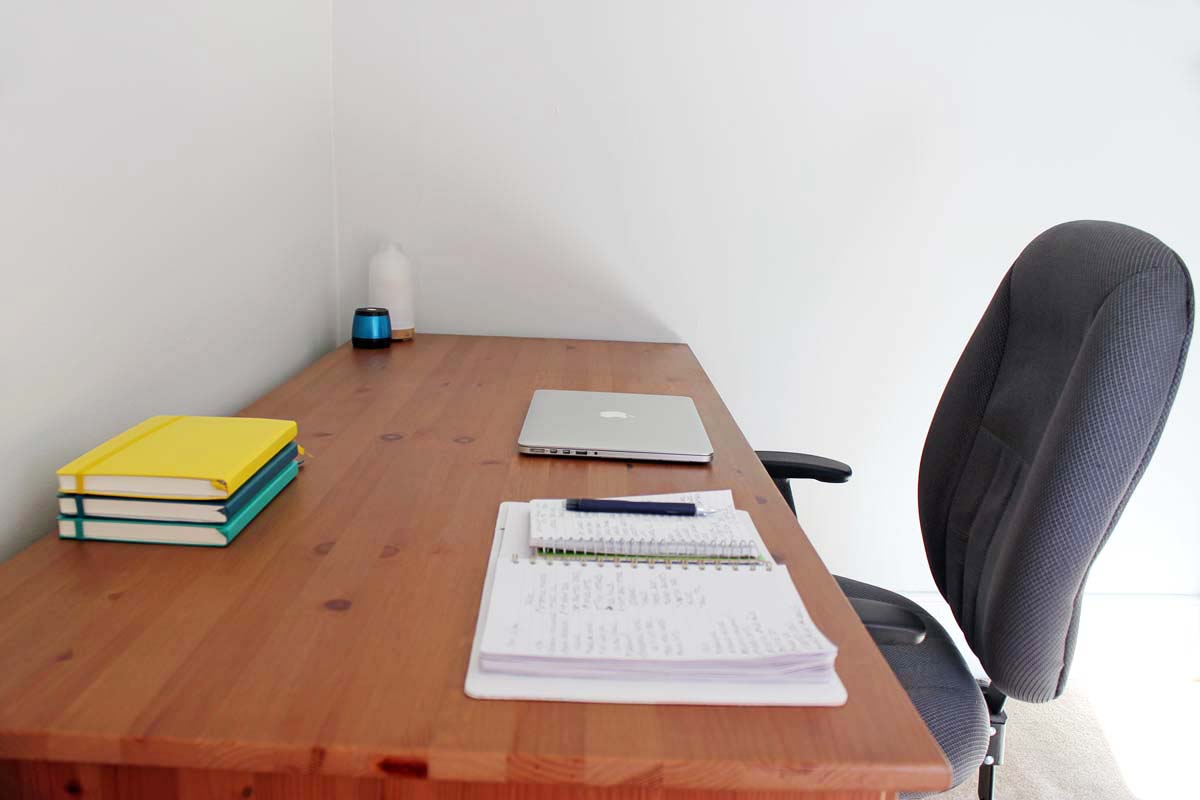
My desk top is clear, the broken printer is gone, and the mess of cords is under control. I've shredded a mountain of paperwork, emptied my desk of clutter I'll never use, and added a coat of paint to walls that were last painted 12 years ago.
The room has actually gone from being ridiculously cluttered to pretty bare. I have a few plans to give the space some personality, and I'll share them here in the future. But I want to live with the changes I've made so far and see how they work first.
When I compare this photo to the before photo, I'm amazed by how oppressive the room used to feel. I can't believe I worked in this space in the state it was in for so long.
I'm absolutely thrilled to have an orderly, functional office and craft room. The room feels bigger, and I feel lighter for having purged a lot of clutter. This space is going to be a great place to take on my goals and projects for the coming year!


New! Comments
Have your say about what you just read! Leave me a comment in the box below.