Jewelry Resin Guide:
All the Supplies You Need to Start Making Resin Jewelry
Which jewelry resin is best for your project? Epoxy casting resin, doming & polyurethane resin each have unique properties making them ideal for different uses. Learn which type you need for your DIY project & discover other casting supplies needed for resin jewelry making.
Jewelry resin is a fun and versatile raw material to use for making handmade jewelry.
It can take a little practice to get your technique just right - Don't use your best jewelry findings the first time you try pouring and casting resin. But after a couple of practice pours, you'll find it's not difficult to make cute handmade pendants, rings, earrings or bracelets using resin.
Success in making DIY resin jewelry depends on having the right tools and raw materials, so let's take a look at which type of resin is best for different projects and what other supplies and tools you'll need.
What is the Best Resin for Jewelry Making?
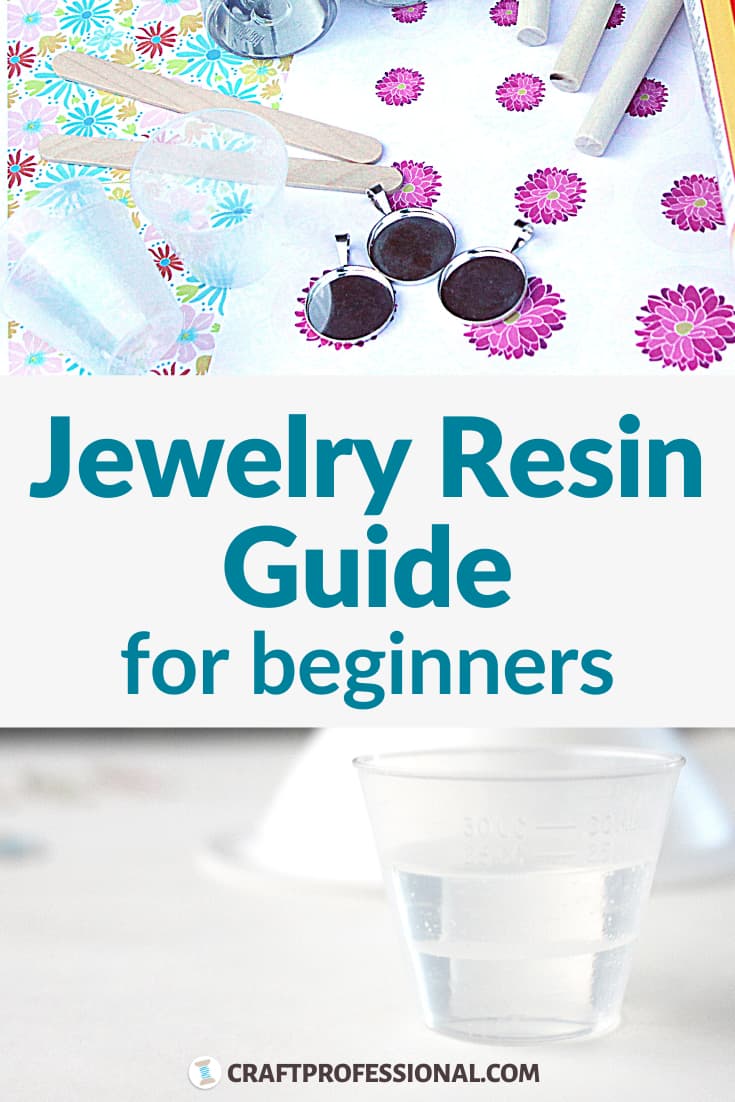
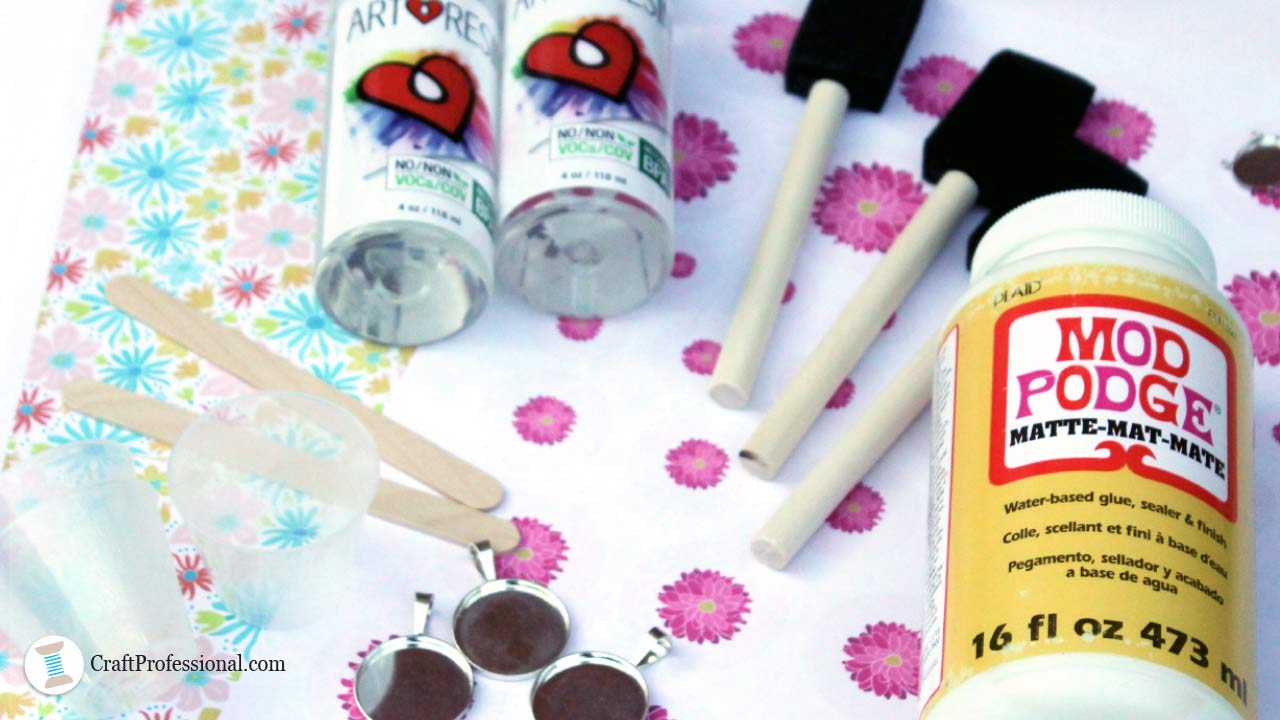 Resin jewelry making supplies: resin, sealant, bezels, decorative paper, and graduated medicine cups.
Choosing the right jewelry resin for your needs can feel a bit overwhelming.
Several types of resin for jewelry making exist. Each type has its own unique properties that make it ideal for some kinds of projects and not great for others. Choosing the wrong type of resin for your project can leave you with nothing but a sticky, smelly mess. Ask me how I know!
Here are the best types of jewelry resin for a variety of DIY projects.
Epoxy Resin
Brands of resin that are labeled "jewelry resin" are typically epoxy resin. There are three types of epoxy resin you should know about.
Three types of epoxy resin:
- Epoxy coating resin (doming resin)
- Epoxy casting resin
- Epoxy resin adhesive
Each kind has its own ideal uses and properties. We'll take a look at the best type of epoxy resin for jewelry making based on the type of project you're working on.
Epoxy Coating Resin (Doming Resin)
Coating resin is used when you want to coat something with a thin layer (about 1/8th of an inch) of resin.
You might use it to cover a tabletop or art work with a thin, smooth layer of resin. You can also use coating resin to fill a jewelry bezel.
You can add color to coating resin, and you can pour it in layers letting it dry in between layers.
Dr Crafty is a lower priced epoxy resin designed for craft projects. It has an easy to measure 1:1 mixing ratio. I have not tried this brand - mainly because I can't easily order it in Canada - but it is a popular epoxy resin.
Doming Resin
Coating resin is what you're looking for when you want doming resin. It is formulated so your resin will create a domed effect on the edges of your project.
The doming effect is what you want when you're coating something (like art) that doesn't have sides, so the resin doesn't drip off the edges. It's also the type of jewelry resin you need to get that nice domed look over the top of a bezel cup.
Doming Resin vs. Casting Resin
Doming resin has a somewhat thick consistency which is needed to create the domed effect. Casting resin is not as thick.
That thick consistency makes doming resin more prone to air bubbles which are tough to remove when casting with larger molds. That's why doming resin is not the best resin for jewelry molds that require resin poured to more than about 1/8th inch depth.
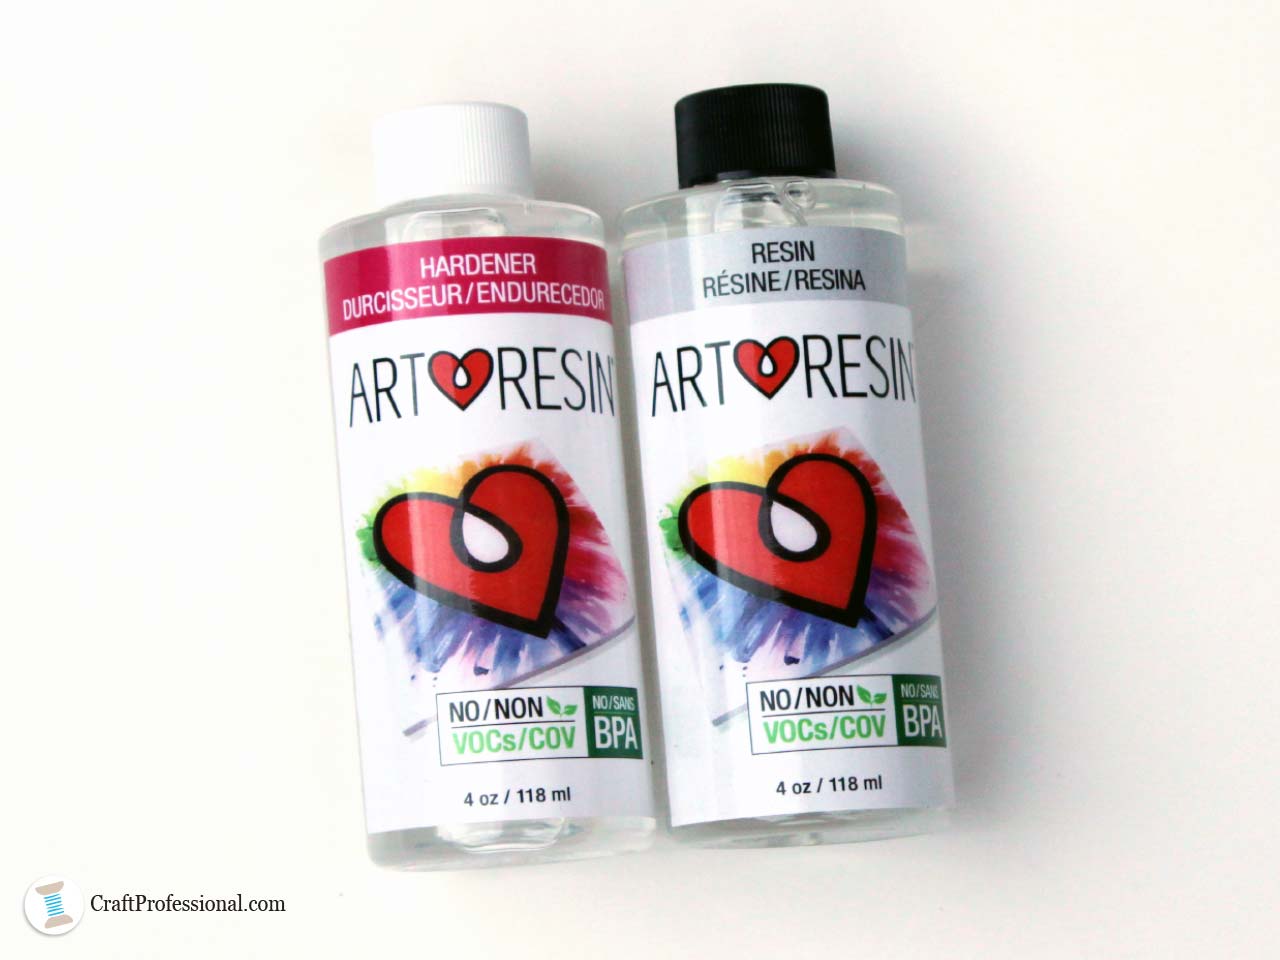
Art Resin
is the brand of epoxy resin I'm currently using. It's a high quality doming resin suitable for jewelry projects.
Epoxy Casting Resin
Epoxy casting resin is used when you want to create a three dimensional cast from a mold. For example, if you wanted to pour resin into a commercial jewelry mold, you'd use casting resin.
Epoxy casting resin is not as thick as coating resin, which allows you to make clean, bubble-free pours more easily. It's best for use in molds that aren't too large or intricate. For casting larger or more intricate items, consider using polyurethane casting resin instead.
EasyCast is a popular epoxy resin that's slow curing, which makes it a good choice for projects with embedded objects. It works for molds of up to about 6 ounces.
Epoxy Resin Adhesive
Epoxy resin adhesive is used for gluing small items together. You won't likely use this product unless you work with designs that require gluing jewelry findings such as earring posts or brooch pins to your project.
Tips for Choosing the Right Epoxy Jewelry Resin
Mixing Epoxy Resin and Hardener
Resin is sold in two parts - resin and hardener (also called catalyst). You'll get two bottles of liquid when you buy epoxy resin. When you use the resin, those two liquids need to be combined in a precise ratio. A 1:1 ratio - that is, you combine the same amount of resin and hardener - is the easiest to get exactly right making those resins easiest to work with.
Yellowing
Over time, and with exposure to light, epoxy resin can take on a yellow tint. To minimize this issue, look for resin with a UV inhibitor or UV stabilizer. In general, the more expensive resin brands will be clearer and more resistant to yellowing.
Polyurethane Casting Resin
Polyurethane casting resin (also called urethane casting resin) is often used to cast figurines or sculptures from a mold. It will capture every detail of your mold, so you might use this type of resin to cast a very intricate bangle bracelet in a silicone mold.
It cures faster that epoxy casting resin, so you won't have much time to work with the resin before it gels. But you also won't have to wait as long to remove your item from the mold.
FastCast by Environmental Technology is a urethane resin that works well in highly detailed molds. Notice this resin is not clear. It cures to an opaque white color. The company does make dyes that are compatible with FastCast if white isn't the look you want.
It has a short, two minute, working time and hardens in ten minutes. It's great if you're in a hurry, but you need to be organized and work efficiently!
Smooth-Cast 320 by Smooth-On is another urethane resin that cures quickly and is designed for use with more ornate jewelry molds. This resin cures to an off-white color, and Smooth-On manufactures compatible colorants for this resin.
Polyester Casting Resin
The big benefit of using polyester resin is that it's a crystal clear casting resin. It will even produce a glass-like look when using large molds. The big drawback is that polyester resin is much more difficult to use safely and effectively compared with other types of resin.
Other resins require you to mix a ratio (often 1:1) of resin and hardener. With polyester resin, you just add a tiny amount (a few drops) of catalyst to the resin. You have to get the amount of catalyst exactly right, or the resin won't cure properly, and it's quite difficult to get that tiny amount exactly right.
Also, polyester resin is quite toxic. You need to take safety precautions when using any type of resin, but polyester resin requires extra care including extremely good ventilation and use of a NIOSH-certified respirator for the fumes.
A Note on Resin Safety
You need to work safely with all resins.
I'm not an expert on chemical safety, but based on all of the advice I've read, I use disposable nitrile gloves to protect my hands, safety glasses to protect my eyes, and a respirator to protect against inhaling fumes when I work with resin.
I also wear old clothes, cover my workspace with plastic, and never wear anything precious (like fine jewelry) while working with resin.
Review the Safety Data Sheet
Manufacturers are required to maintain Safety Data Sheets (SDS) that document hazards and safety precautions you need to take when working with a product. You should review the SDS for any resin you use. It will tell you what you need to do to work safely with the product.
You'll be able to find the SDS for your jewelry resin on the company's website.
Resin Jewelry Kits for Beginners
Before we dive into all of the other supplies you'll need to make resin jewelry, I want to show you the option of simply getting a resin jewelry making kit.
I like the idea of getting your additional supplies in a kit because it makes the job of gathering everything you need so much easier. Also, buying supplies in a bundle will almost certainly save you money.
Kits typically don't include all of the safety gear that's recommended when working with jewelry resin. So if you do choose to buy a kit, please scroll down to the section "Protect Yourself and Your Work Space" to learn more.
There are plenty of jewelry resin kits that make getting started easy.
I like this particular kit because it includes all of the extra tools and supplies you need to get started. It doesn't include the jewelry resin, but I think that's a positive feature. You can buy your resin separately and make sure you choose a high-quality product that's appropriate for your projects.
Of course, a resin kit for beginners might not be your style. You may want to choose all of your materials individually with care. If that sounds like you, keep reading, and you'll find a list of everything you need to work with jewelry resin.
Something to Shape the Resin (Jewelry Molds or Bezels)
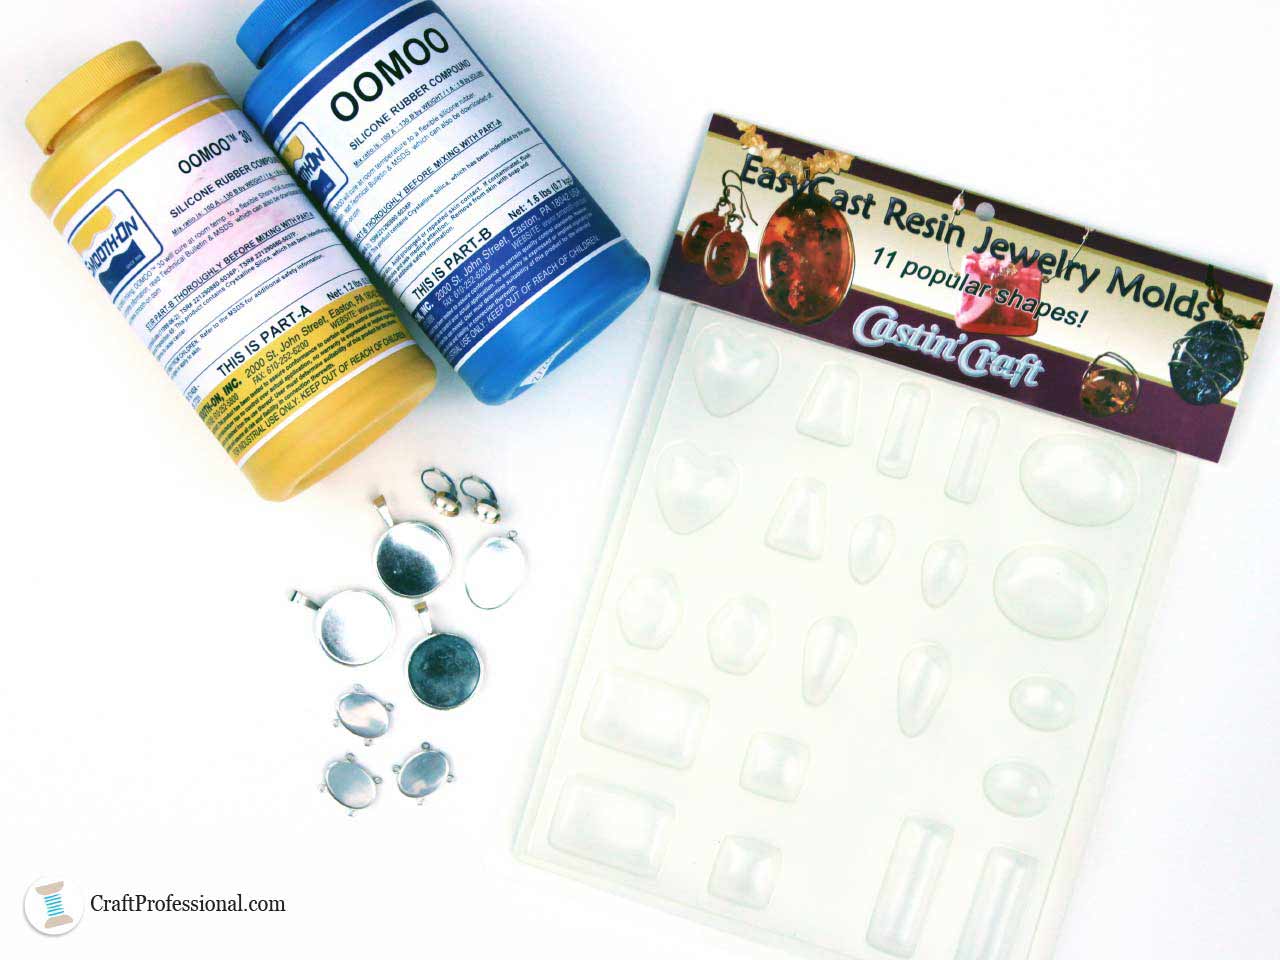 Jewelry resin can be shaped with: bezels, commercial molds, or DIY molds made from a silicone mold making kit.
Next, you'll need to decide how to shape the resin.
You can get creative and experiment with different ways to form your resin jewelry, but there are a few common options including:
- Closed back bezel cups
- Open back bezels
- Commercial jewelry molds
- Make your own jewelry molds
Closed Back Bezel cups
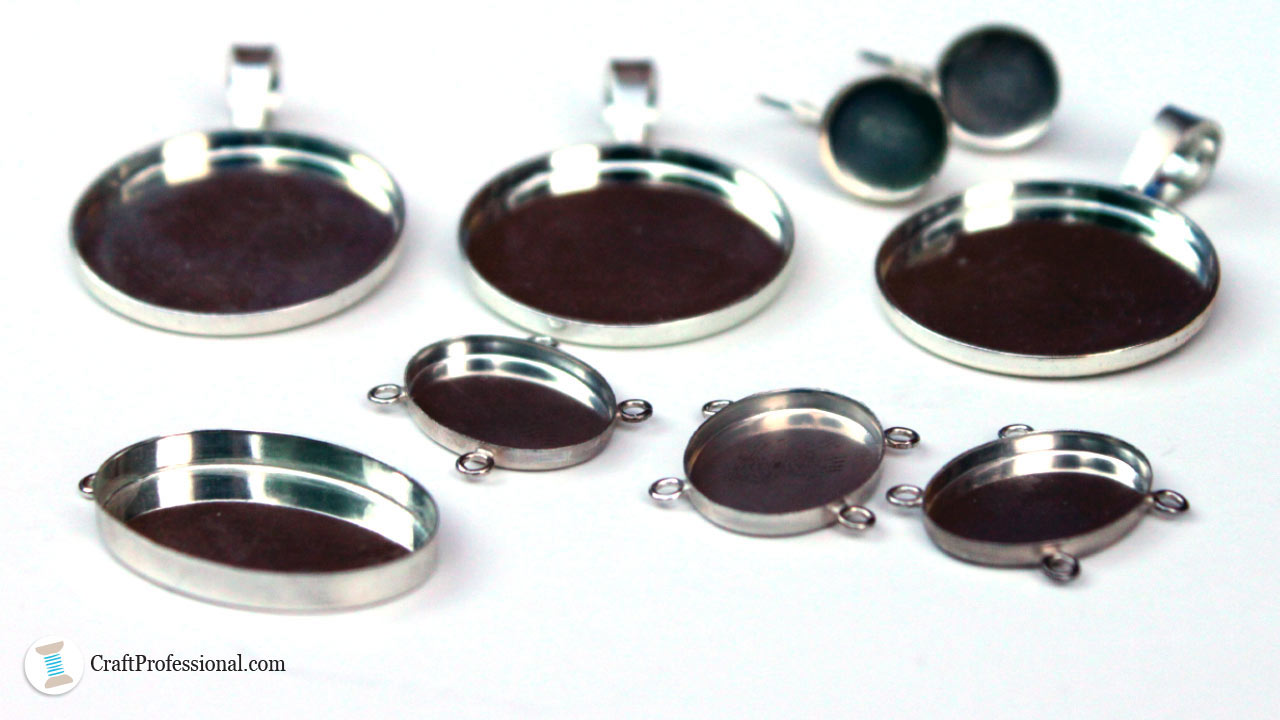
You can find closed back bezel trays for making resin pendants, earrings, bracelet charms, and rings. It's a matter of looking around and finding a design that suits your style.
I like to design and print images on paper that I cut to fit to the bezel, and then fill the bezel with resin. Other people embed dried flowers in bezels or enhance their jewelry resin with color or glitter.
Open Back Bezels
You may be surprised to learn you can use open back bezels to make resin jewelry. You just need to seal the back of the bezel with tape so the resin doesn't leak out as it dries.
Enhance your resin with color, glitter, or tiny charms to create an attractive design.
Commercial Resin Jewelry Molds
Commercial resin jewelry molds offer a simple and inexpensive option for making resin jewelry because you don't have to buy bezels to shape your resin. There are plenty of fun resin jewelry molds on the market, and you can use them to cast earrings, pendants, rings and even bangle bracelets.
Simply spray the mold with mold release and add your jewelry resin and any design elements. Once the resin has cured, you can pop out your item and finish it by sanding, polishing, and/or adding jewelry findings as your design requires.
DIY Resin Jewelry Molds
Making your own jewelry molds is a more advanced DIY jewelry technique. It's not difficult, but it adds some extra steps to the whole process.
If you're a beginner, I'd suggest starting with something simpler, like commercial molds. But once you master the basic techniques, you might want to try your hand at making your own unique resin molds. It's easy enough to learn and opens up fun design possibilities.
There are a few products on the market designed for this type of mold making. I've used the Smooth-On Oomoo silicone mold making kit to create DIY jewelry molds and have been happy with the results.
Design Elements
One reason making resin jewelry is so much fun is the huge range of things you can add to your resin to create a massive range of designs.
What to put inside resin jewelry:
- color
- glitter
- scrapbook paper
- collage sheets
- dried flowers
- small 3D objects
- charms
Epoxy Resin Dye and Pigments
You can't simply put any old dye in your resin. Colorants that contain too much water or aren't concentrated enough will produce disappointing results.
Luckily, there are pigments designed specifically for use with epoxy resin.
I'd start with these products when adding color to resin, so you don't have to worry that the added color will cause problems with your project.
Do check the manufacturer's instructions for the jewelry rein you're using. Some - like urethan resin - are more sensitive to moisture, so you'll need to make sure the colorants you're adding are compatible with your resin.
Glitter for Resin
Want to get sparkly? Add some glitter to your resin projects! You can use gilding flakes for a chunkier look, or micro-glitter for a more subtle look.
Stampendous Micro Glitter will give you a subtle shimmery look.
Or you might like to try Creative Expressions Gilding Flakes for a more substantial gilded look.
Paper in Resin
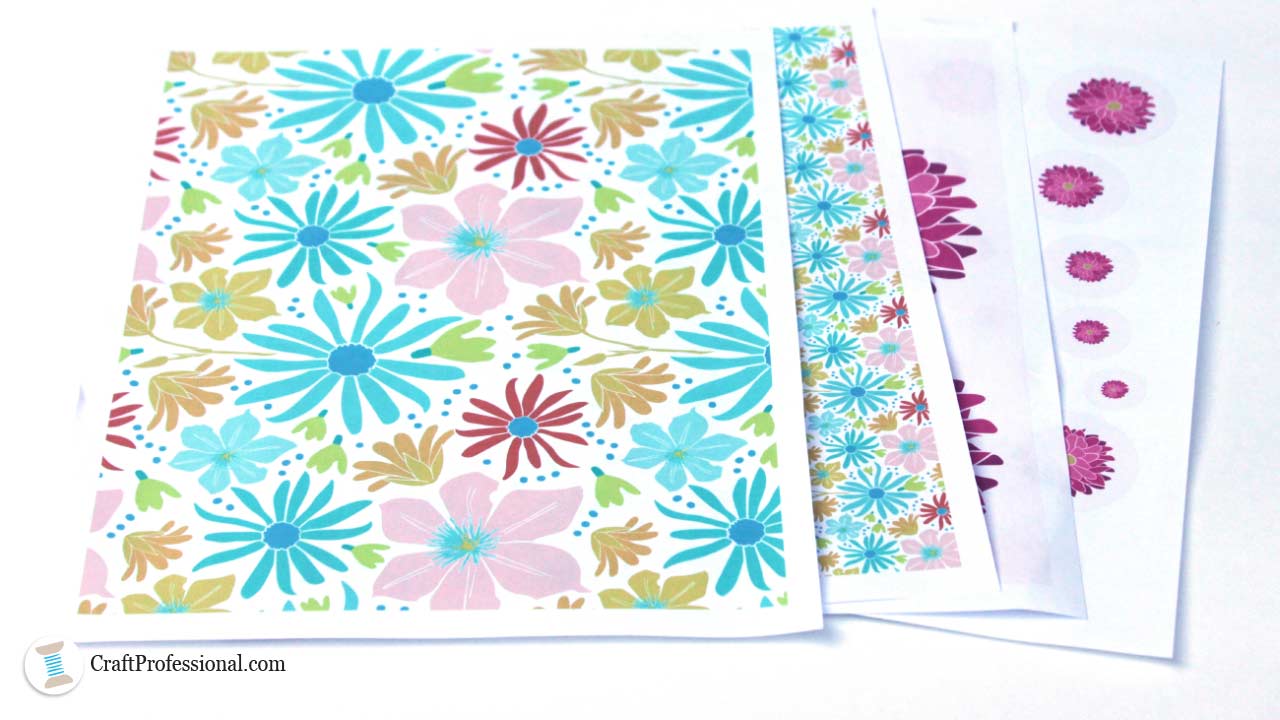
Yes, you can cast paper in epoxy resin. You just need to coat anything porous (like paper) before casting or it will become discolored by the resin.
Cut your paper to the shape you want, coat it with a sealant (I use Mod Podge ), and let it dry thoroughly before you add it to your jewelry resin.
I like to create my own images to embed in bezels or molds, but you can also make fun resin jewelry with collage sheets that are designed specifically for this kind of mixed media art project.
You can also use scrapbook paper to make fun resin jewelry.
Dried Flowers in Resin Jewlery
Have a look around Instagram - try searching #resinflowers and #flowersinresin - and you'll find lots of beautiful handmade jewelry with dried flowers embedded in resin. You can use flowers from your own garden, or commercially available dried flowers .
Just be certain your flowers are completely dried before using them in resin. If any moisture is left in the flowers, your jewelry resin won't cure properly.
3D Objects and Charms
Try searching Amazon for resin fillers and you'll find plenty of adorable tiny charms you can embed in your jewelry resin.
You can also look up resin flatback for more tiny items you can embed in resin. If you don't find anything that suits your project, try adding words like "charm" "embellishment" or "scrapbook" to your search.
Just be sure to check the material your 3D objects are made of to ensure they are compatible with resin. Also, if you buy them online, read the product description carefully to make sure the charms are the right size for your needs. It can be tough to judge the size of small items you buy online. You may even want to check the size against a ruler to be sure.
Problems to Avoid When Adding Items to Resin
There are plenty of things you can use to enhance your resin jewelry. You just need to make sure the items you add are prepared correctly and:
- won't prevent the resin from curing properly
- aren't precious, irreplaceable or valuable
Items that prevent resin from curing properly:
Items that aren't completely dry can prevent your jewelry resin from curing properly so it remains sticky or flexible. Common culprits are dried flowers that aren't completely dried, or too much color added to the resin.
Also, some resin is more sensitive to moisture than others. Check the manufacturer's instructions to find out what you can and cannot add to the specific resin you are using.
Precious items in resin:
I would not advise casting your most precious treasures in resin. If you would be heartbroken if something was ruined, do not cast it in jewelry resin.
If you're a beginner at making resin jewelry, you will make mistakes until you get the hang of the technique. You don't want something irreplaceable cast inside a failed batch of resin. Also, epoxy resin can yellow over time and with exposure to light, which makes it not ideal for items you may want to preserve and hand down to future generations.
There are plenty of inexpensive, readily available items you can embed in resin to create beautiful designs. Save your most precious treasures for something else.
Supplies for Measuring and Mixing Resin
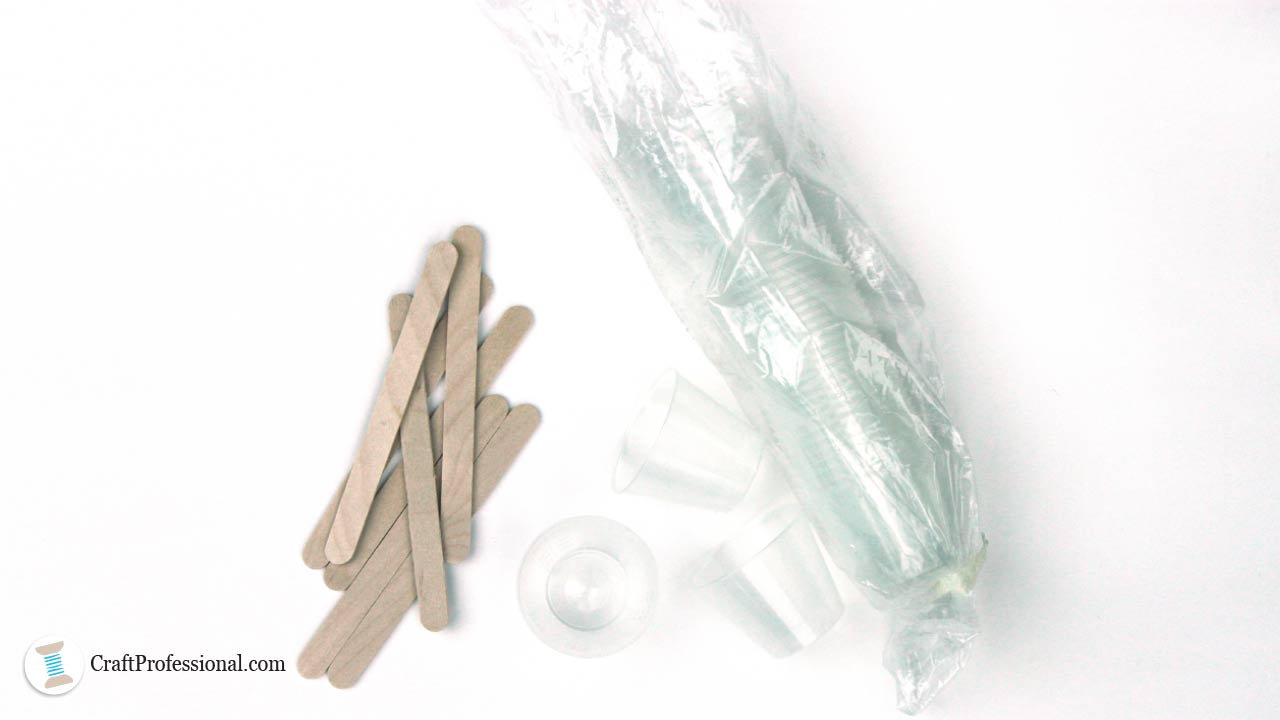
These supplies are easy and super-cheap to buy. As a beginner, all you need to mix and measure your jewelry resin are graduated medicine cups to measure your resin and hardener, and craft sticks to stir.
Some craft suppliers sell resin mixing cups, which are pricier than medicine cups. I've always used an inexpensive pack of one ounce graduated medicine cups, and I've never had a problem with them.
In my opinion, the one ounce size is perfect for your first resin jewelry projects. You don't need a lot of resin to make most jewelry projects, and you have to work fairly quickly to get your resin poured before it starts to set. That's why it's helpful to start off working with smaller batches of resin.
Once you have some practice, you'll be more efficient and able to make several items at once. At that point, you might want to buy some larger resin mixing cups .
FYI: "Graduated" medicine cups are medicine cups with measurements on them.
Mixing your jewelry resin and hardener in exactly the right proportions is absolutely crucial for good results. That's why you need disposable mixing cups with units marked on them for measuring. You cannot eyeball your resin and hardener amounts and expect good results.
Removing Bubbles
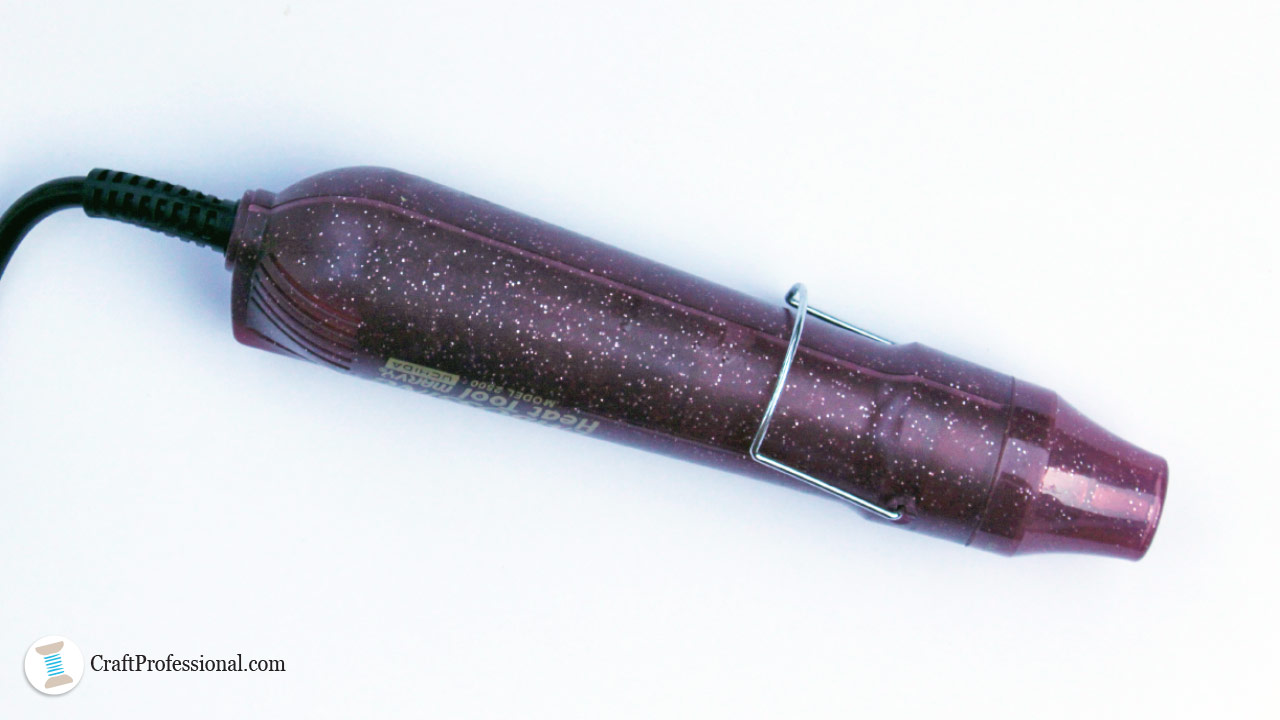
Tiny air bubbles are the bane of any resin jewelry maker's existence. No matter how carefully you stir and pour, it seems there will always be a stray bubble or two (or more) in your resin.
That's why you need an embossing heat gun!
A heat gun blows a very gentle stream of warm air. In my opinion, it's the best way to remove air bubbles from jewelry resin.
Some people recommend other options such as: blowing through a straw, holding a match over the resin, or using a hair dryer.
But all of those options for removing bubbles have problems.
- Blowing through a straw over resin makes me nervous. Maybe other people are more coordinated than I am, but I don't trust myself to avoid inhaling when I'm supposed to exhale!
- Holding a match over the resin is okay for a short time, but it doesn't last long, so it's not great if you have several stubborn bubbles to deal with. Plus, if you hold a flame too close to resin for too long, it may not cure properly. Perhaps a lighter would do in a pinch, but it's not my number one choice.
- Blowing a hair dryer over resin is risky because hair dryers blow air with a lot more force than a heat gun. You run the risk of disturbing your resin.
Believe me, I'm not a person who buys the pricier item when a cheaper tool will work just fine. If you're going to work with jewelry resin a lot, it's worth getting a heat gun for resin bubbles.
Protect Yourself & Your Work Space
I'll provide general tips you can use to protect yourself and your work space while using jewelry resin, but do read the safety instructions for the specific resin you use.
Look for the Safety Data Sheet (SDS) on the manufacturer's website. It will tell you what you need to know to work safely.
Protective items for working with resin:
Good ventilation - Resin should be used in a place with good ventilation
Respirator - A National Institute of Occupational Safety and Health (NIOSH) approved respirator that filters fumes will help protect you when working with resin. Some resins are more toxic than others - that's why you should check the SDS. Use a respirator - it's far better to be safe than sorry!
Disposable nitrile gloves - Protect your hands with disposable glove. Nitrile is recommended instead of latex because latex can interfere with resin curing.
Safety glasses - You certainly don't want resin to splash in your eyes, so get yourself a pair of safety glasses.
Old clothing - When working with jewelry resin, don't wear anything you don't want ruined.
Plastic to cover your work space - Cover your work space with a garbage bag, plastic drop cloth, or parchment paper. You don't want to accidentally spill jewelry resin on your beautiful dining room table!
Supplies & Tools You May or May Not Need
A clean box - You can use any clean, empty container that will fully cover your resin project and protect it from dust as it cures.
Sealant - Use a sealant to seal porous material, like paper, before you embed it in resin. I use Mod Podge . If you're not adding anything porous to your jewelry resin, you don't need sealant.
Resin mold release - If you're going to use molds for jewelry resin projects, you'll need some mold release to help the cured resin easily pop out of the mold. You do not need mold release if you are only making projects with bezels.
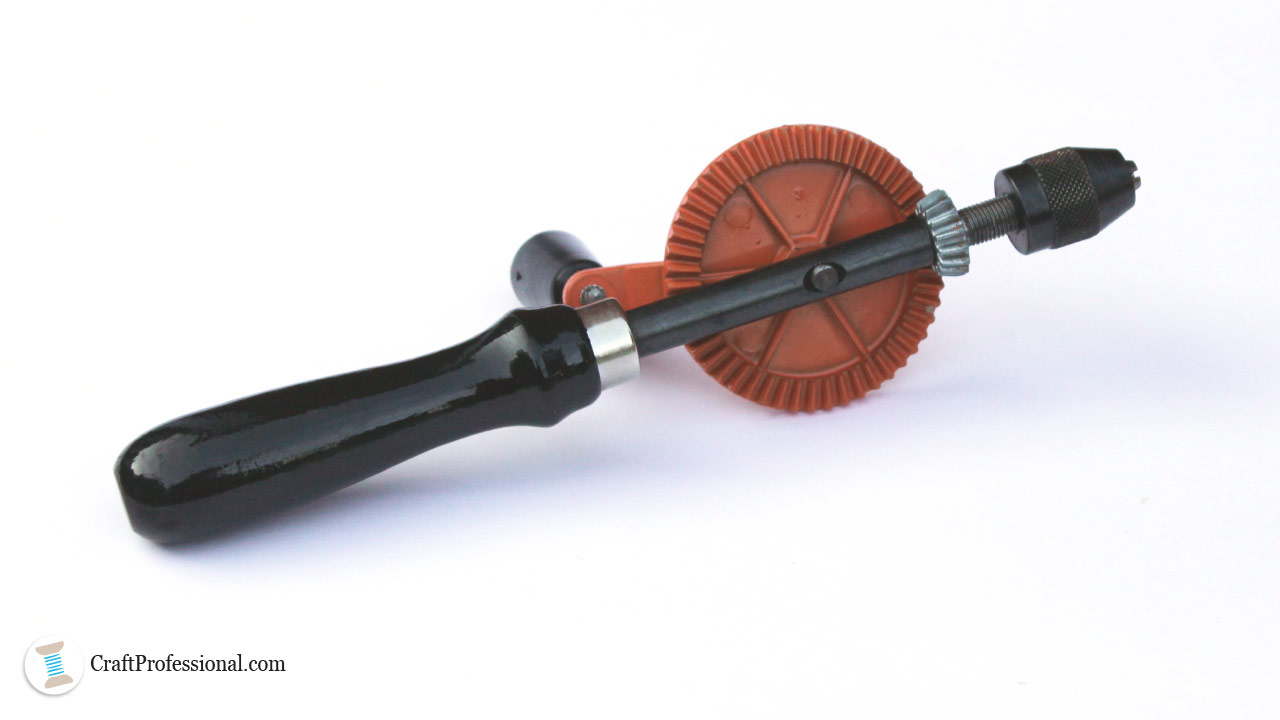
hand drill - If you want to drill a hole in your cured resin, a hand drill will do the job. You can't use a standard drill because it will generate too much heat.
Fine grit sand paper - Your resin projects may need a little sanding to smooth the edges. Wet sanding (with your item under water) will help keep dust particles out of the air.
carnauba wax and a soft cloth - Use these items for polishing resin.
Jewelry making findings - You may need some basic jewelry findings to complete your design such as: ear wires, chain, jump rings, clasps
Jewelry making tools - You may also need some basic jewelry tools including: jewelry pliers, and a jewelry wire cutter
Resin Jewelry Making Supplies Summary
Phew! That was a lot of information and a lot of options.
Remember, you don't need to buy everything on this list. The supplies you need will depend on the type of project you want to make.
Since you might be feeling a bit of information overload right now, here's a quick summary of what you'll need.
1. Resin
- epoxy coating resin - For projects that need a thin layer of resin, like bezels filled with resin.
- or epoxy casting resin - For projects in molds that aren't too big but need a thicker layer of resin.
- or polyurethane casting resin - For casting larger or very detailed items.
Consider a resin jewelry making kit to simplify your shopping.
If you don't want to spend the time picking out all of your supplies for DIY resin jewelry, consider a resin starter kit that contains everything else you need. Then you'll just have to buy the resin and make sure you have the right safety gear.
2. Something to Shape the Resin
- bezel trays - Either closed back bezel cups or open back bezels can be used to make resin jewelry.
- or jewelry molds - There are plenty of fun commercially available resin molds. Once you get proficient at casting resin, you can make your own molds if you like.
3. Design Elements
You can use any combination of these elements in your resin projects:
- pigment - For best results, choose colorants designed for use with the type of resin you're working with.
- glitter - You can create a variety of effects with everything from larger gilding flakes to tiny micro-glitter.
- scrapbook paper
- collage sheets
- dried flowers - You can buy commercially available dried flowers, or dry your own flowers from your garden for a more personalized project.
- small 3D objects and charms - Look for "resin fillers" or "scrapbook embellishments" to find a variety of options you can use in your projects.
4. Measuring and Mixing
- graduated medicine cups - One ounce cups are ideal to start.
- or resin mixing cups - They come in larger sizes that are handy if you need to mix more than one ounce of resin.
- and craft sticks - A perfect, inexpensive tool for stirring your jewelry resin.
5. Removing Bubbles
- embossing heat gun - In my opinion, this is the best tool for removing bubbles from resin.
- or a lighter - An inexpensive alternative tool that you might already have around the house.
6. Protect Yourself & Your Work Space
- respirator - Protect yourself from fumes. Be sure to check the resin's Safety Data Sheet to see exactly what you need to be safe.
- disposable nitrile gloves - To protect your hands.
- safety glasses - To protect your eyes from splashes.
- old clothes
- plastic to cover your work space - Garbage bags, plastic drop cloth, or parchment paper all work.
7. Other Supplies You May or May Not Need
- a clean box - To protect your project from dust while it dries.
- resin mold release - Mold release is essential to help your cured resin pop out easily if you're using molds. Don't use mold release if you're using bezels to make your resin jewelry.
- sealant - Use sealant to seal porous material (like paper) you want to embed in resin. Sealant is not required if you're embedding non-porous items in resin.
- hand drill - If you want to drill a hole in cured resin, a hand drill will get the job done without generating too much heat.
- carnauba wax and soft cloth - Carnauba wax is great for polishing resin. It can be found in the automotive section at your local hardware store.
- fine grit sandpaper - Necessary if you need to sand your resin.
- jewelry making findings - For example, ear wires, chain, jump rings, or clasps that you may need to finish your project.
- jewelry making tools - For example, jewelry pliers, and/or a jewelry wire cutter you may need to finish your project.


New! Comments
Have your say about what you just read! Leave me a comment in the box below.