How to Display Necklaces at a Craft Show
How to display necklaces at a craft show. Lots of jewelry booth photos show you how to display your handmade necklaces and pendants.
Necklace Display Featuring Trends and Texture
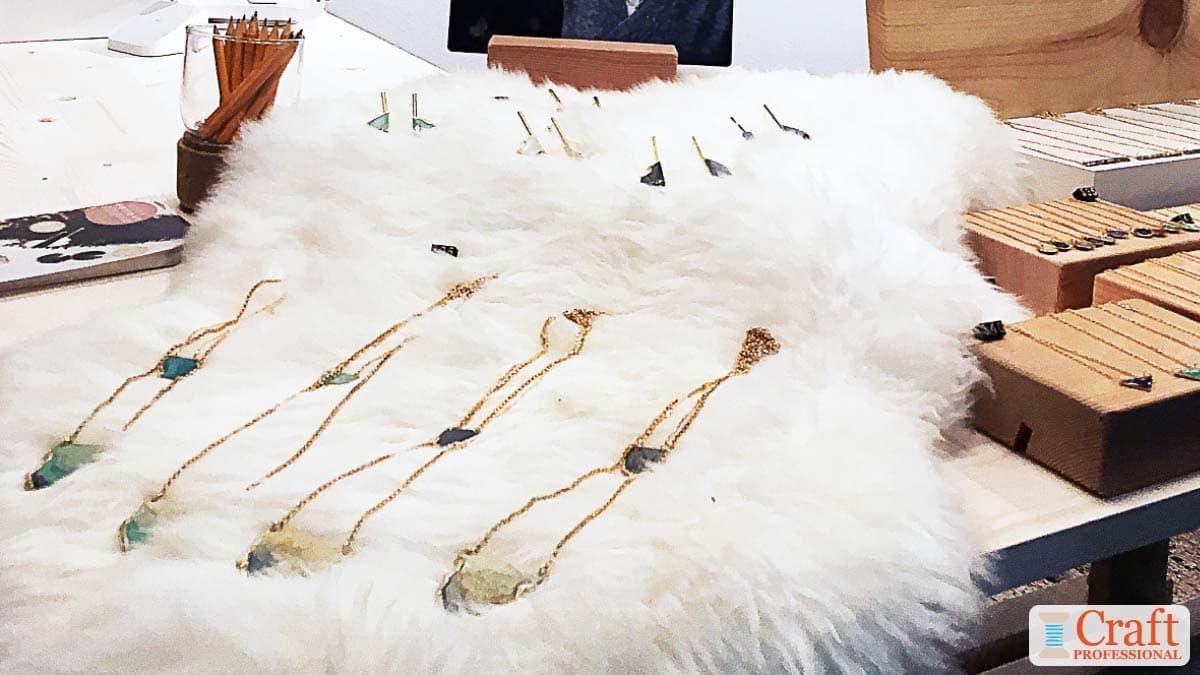
This first jewelry booth (below) is a tabletop necklace display that features handmade gold jewelry displayed on a white faux fur table covering.
Faux fur happened to be a hot decor trend at the time this photo was taken, so it helps to add interest to the booth. When this trend passes, it will be easy to remove the covering from the display if the designer wishes.
If you'd like to add a trendy feature to your craft show display, be sure it is an element that can easily be removed if the trend starts to look dated to you. Use timeless elements for the foundation of your display, so it will continue to look great over time.
The faux-fur table covering also adds an inviting element of texture to the display, adding interest and variation to the overall look, and inviting shoppers to touch.
I earn a commission for purchases made through links on this page.
To learn more, please see my disclosure.
A Traditional Necklace Display
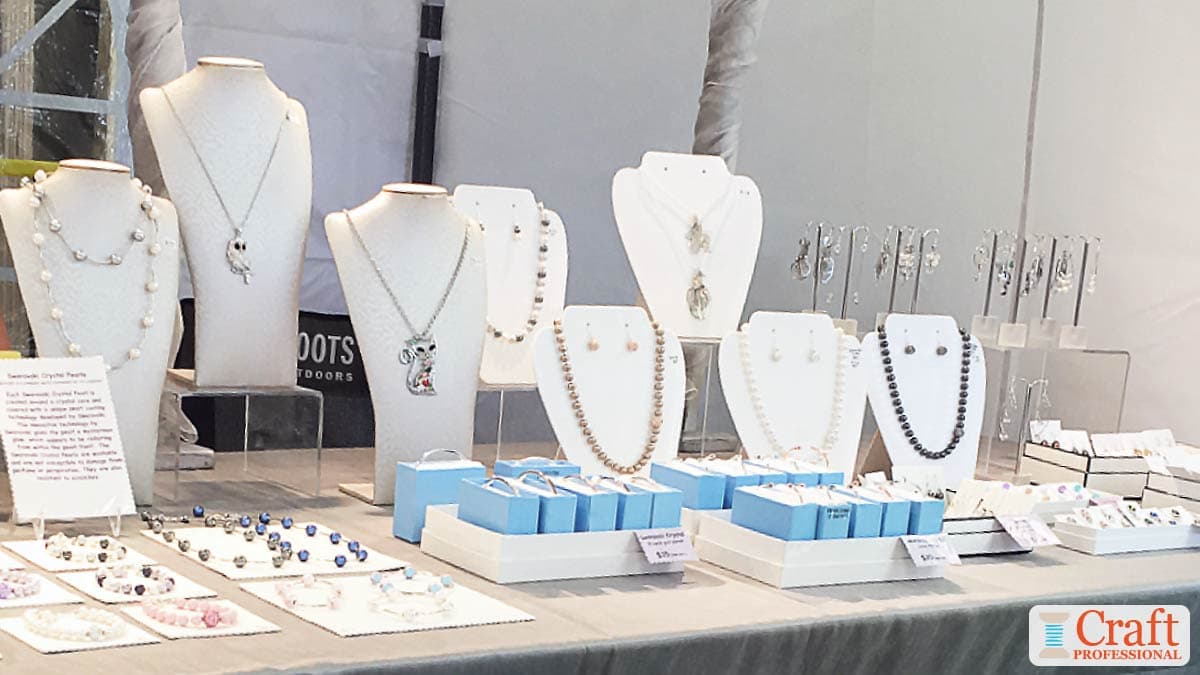
This next jewelry artist has chosen to display necklaces on very traditional white necklace busts. The jewelry is quite traditional in style, so the display works perfectly with the product and draws in the right customers.
Notice the clear acrylic stands used to raise some of the jewelry busts. Clear acrylic stands are a retail merchandizers' best friend. They are a simple, portable, and affordable tool to give you the flexibility to create exactly the look you need.
Varied height helps add interest to any display. If you look carefully, you'll see that the necklace busts together create an asymmetrical pyramid shape.
Pyramids are a powerful design element in visual merchandising. They help you raise items to eye level and draw attention to the most impactful item in your display. It's easy, with the help of a few acrylic risers, to arrange a tabletop display in a pyramid shape.
I've written all about this merchandising technique, along with some other smart retail strategies that work in a 10x10 booth space. You should check it out.
Mannequins Display Statement Necklaces
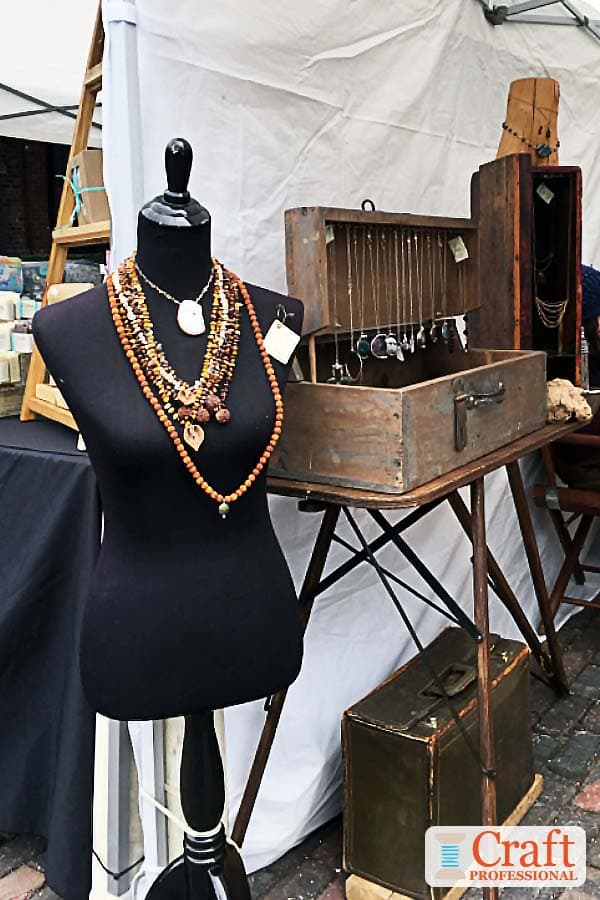
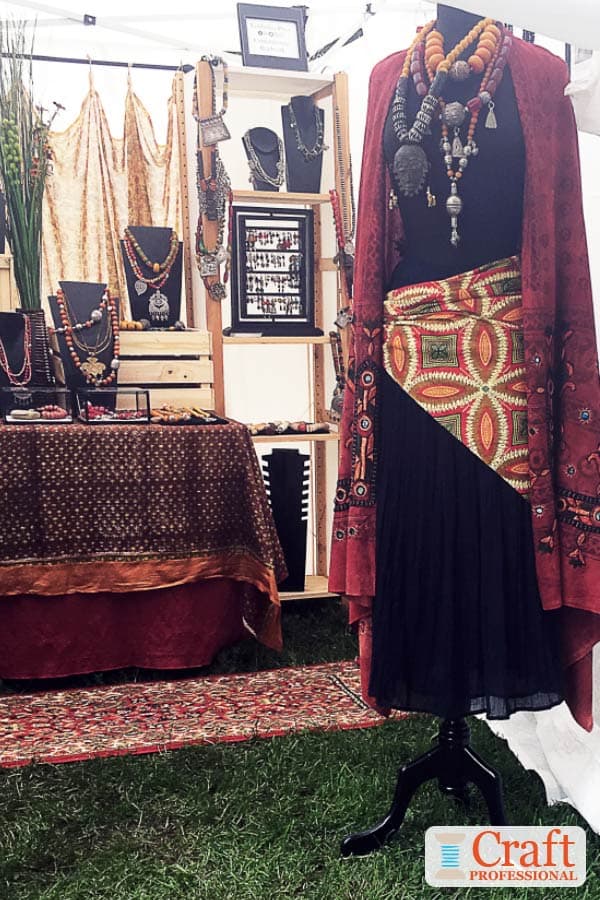
The next two booth photos show how a mannequin or dress form effectively draws attention to your display and helps to bring shoppers into your booth.
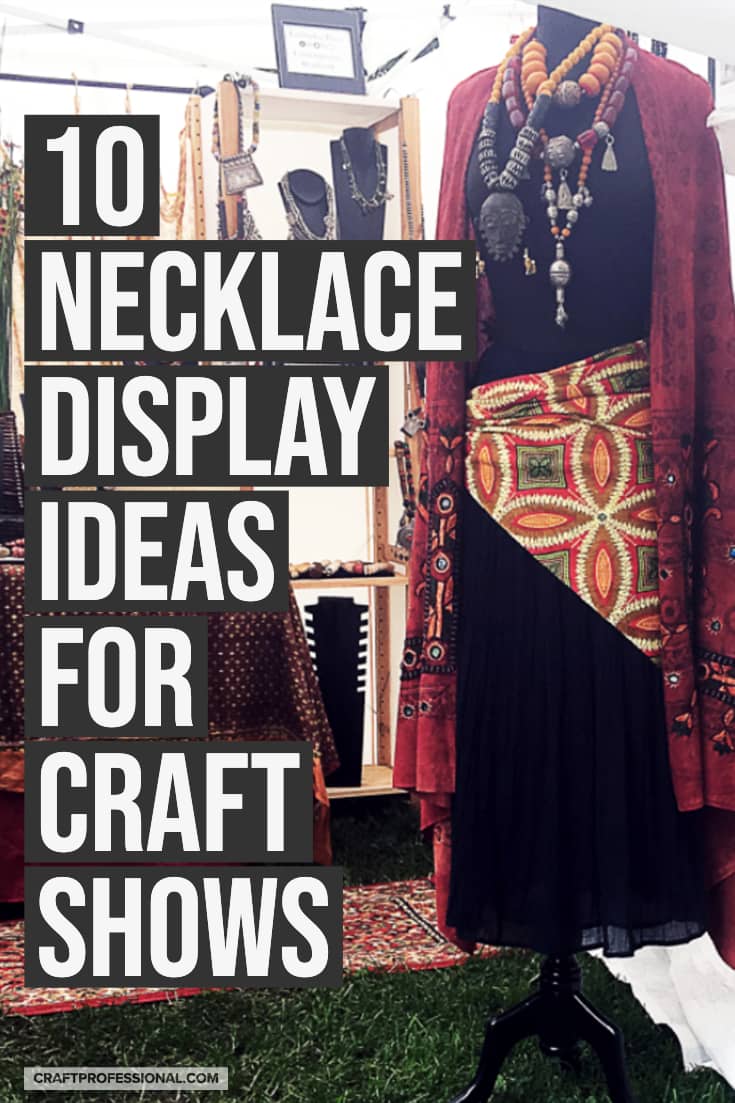
One challenge when you display necklaces is deciding how to take something that's fairly small, and make it visible and attractive from a distance. Layered statement necklaces on a dress form placed at a front corner of your booth can help accomplish that job.
As you'll see in the next two photos, layering several necklaces helps to add substance to the display, making it more dramatic. Placing the mannequin at the front of your 10x10 space helps to bring your display forward into the field of view of shoppers passing by.
Placing a dramatic and eye-catching item near the front of your display is particularly helpful if you use a booth design that places a lot of your items toward the back wall of your tent where they aren't as immediately visible.
Draw Attention with a Mannequin at the Front of Your Booth
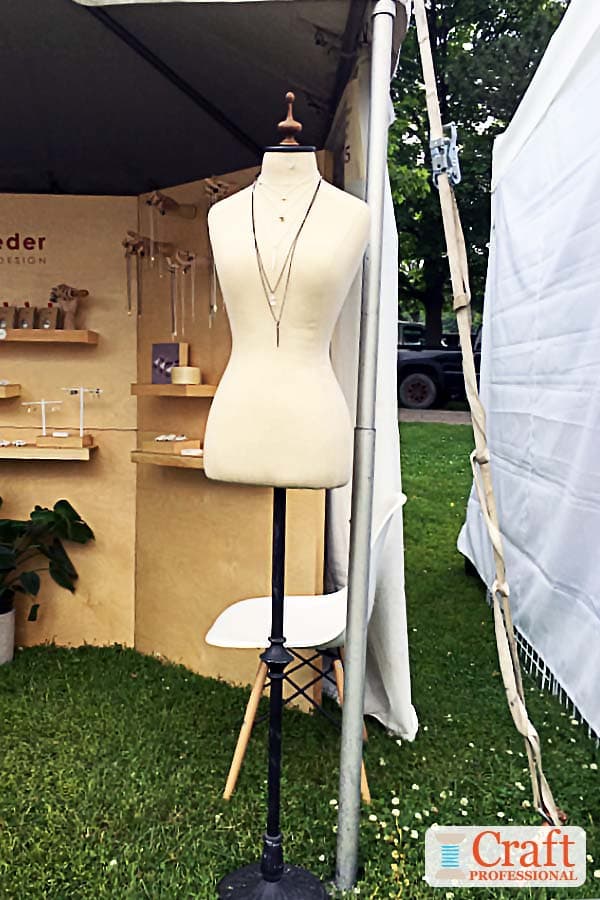
Here's another way to draw attention with a mannequin at the front of your booth, but the look and approach is completely different.
This time, the jewelry designer has chosen a white dress form to display necklaces. It suits the look of her jewelry, and her wood display much better than black would.
Also, her jewelry designs are quite small and delicate with beautiful detail. There are no big statement necklaces in her collection. That's okay, because a big statement piece on the mannequin out front wouldn't match with the rest of the collection and the overall display.
We see in this jewelry booth that even a smaller, more delicate pendant or two can take center stage on a dress form placed at the outside edge of your display space.
Clever DIY Necklace Display on Wood Stands
Here's a beautiful, cohesive, completely custom made jewelry booth.
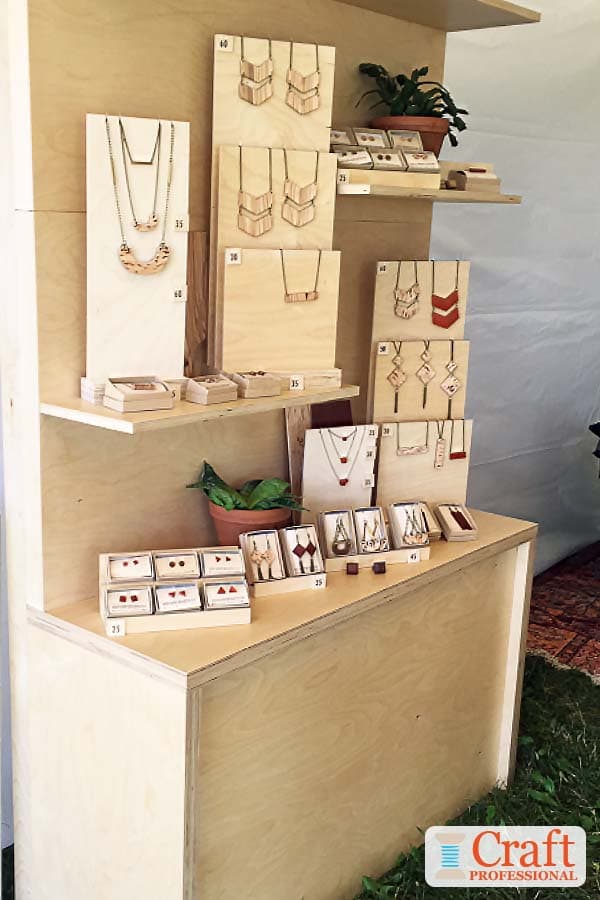
Everything from the display furniture, to the necklace stands match perfectly in this booth because it is all custom made.
If woodworking is not your thing, if you already have your larger display furniture, or if you don't want to commit to such a large project, you could simply take inspiration from the way this jewelry designer displays necklaces. Rectangular wood boards with matching stands are an easy and effective way to display necklaces at a craft show.
You can DIY this type of necklace display stand, or buy similar ready-made stands.
Hanging Pendant Display
Hanging necklace displays are great for encouraging customers to touch.
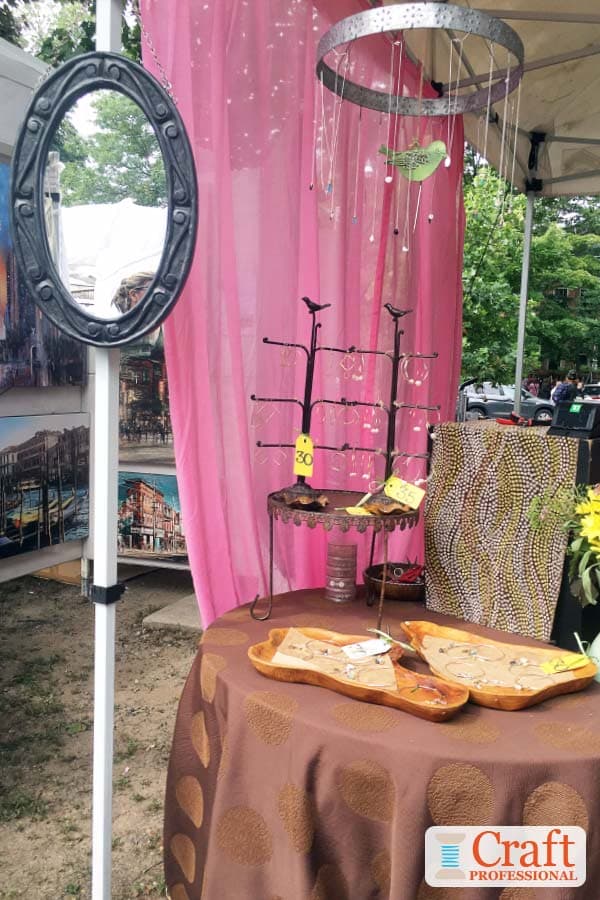
If you want shoppers to handle your pendants, display them on some type of hanging display, like the one featured here. Or you might try displaying pendants hanging from branches (you'll find that photo about half-way down the page linked above).
Whenever I see a display with hanging pendants at a craft show, the booth is almost always full of shoppers touching the pendants for a closer look.
I don't have a lot of photos of this type of necklace display simply because these displays often don't photograph beautifully. My photos often don't do the display justice. The next time you're at a craft show, try to find a jewelry booth that features hanging pendants, so you can see for yourself. I find even though they don't always photograph as well as other display choices, they often look and function beautifully in person.
Unique Necklace Display on Hanging Wood Panels
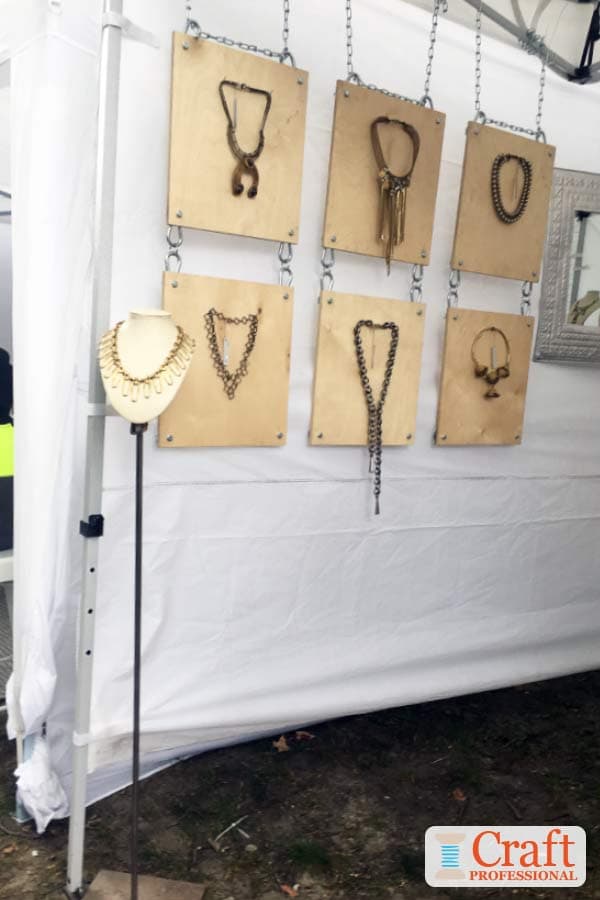
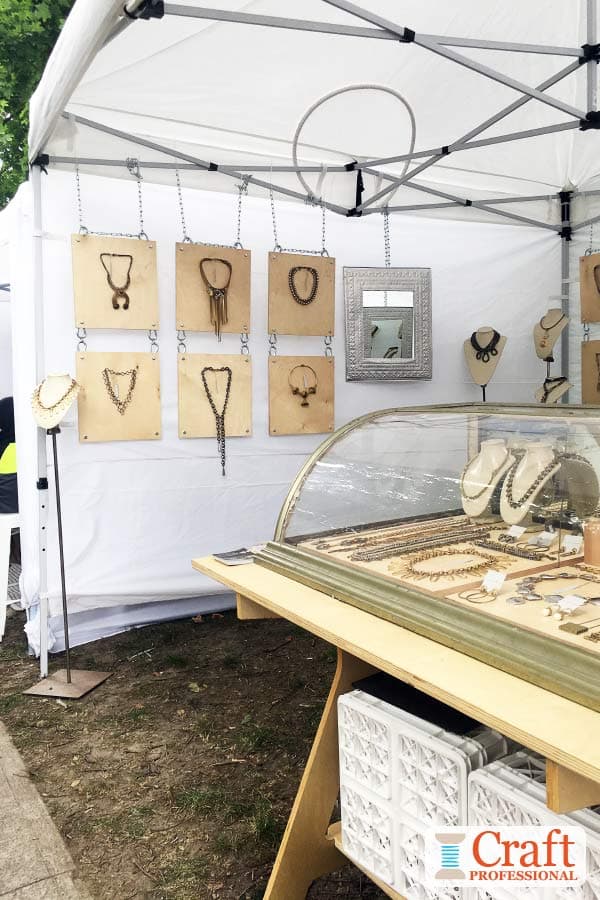
The final jewelry booth features a clever way to display statement necklaces.
Fairly large wood rectangles are connected together and hung from the jewelry artist's tent frame. Some of the designer's most impactful necklaces are secured, one per board, to the wood frames.
This display creates an impactful art wall of statement necklaces. Notice the display is positioned at the all-important eye-level for maximum exposure.
A statement necklace display wall like this one pictured below would not be difficult to DIY, and you could choose different materials, or use different color choices to create a look that suits the aesthetics of your own jewelry designs.


New! Comments
Have your say about what you just read! Leave me a comment in the box below.